Imagine editing an impressive blog post or navigating through your website, and suddenly, your website crashes. No, this does not necessarily mean someone is hacking your website, especially when you see the “Err Connection Timed Out” on your screen.
Most blogging nowadays does not require to know technical stuff such as code and databases. You can get it all set up from the hosting server and WordPress, which has made our life much easier. But when you see messages like “Err Connection Timed Out” on your WordPress website, at first, you might feel panic. But then, you know there is definitely a solution out there. And this is it.
In this guide, I will help you with some steps to fix the “Err Connection Timed Out” on your website and how to avoid them in the future.
Let’s get started.
Also read: 9 Tips to Fix Pink Screen on MacBook Pro
6 Steps to Fix Err Connection Timed Out Error on WordPress like a Pro
When you see an “Err Connection Timed Out” error on your WordPress website, it is because all the server resources allocated for the website are exhausted. For a smaller percentage of reasons, it can also be due to faulty plugins, code changes, and buggy themes. Currently, while you are reading this part of the guide, we don’t exactly know what is causing the issue.
So, we will try each of our solutions to fix the error and get your website live again.
But before we proceed. We need admin access to the WordPress website, access to the hosting service, and some patience, as it may take some time.
Get 30% to 200% Faster Website Performance
- High-performance CDN
- Google’s cloud servers
- Reduce load times by almost 49% (TTFB, cache, and more)
- Site backups and uptime checks
- Free SSL certificates
1. Increase the Memory Limit
Our computers are still far from using qubits or some other kind of computer language and still work in memory units. So do the web applications and the entire internet. From storing data to retrieving it, everything works only when you have sufficient memory for your code to run. PHP is one of the languages that the web uses for communication with the server; it is a backend programming language and requires a small amount of memory.
But, when you have a big website or a bulky theme that has huge PHP code, you might be exhausting this memory limit. To tackle this situation, you can always increase the memory limit from the default 32 bits to 64 bits.
Here is how you can do that,
- Login to your hosting’s file manager; you can FTP interface, or if you are using cPanel, you can log in and check for the file manager option.
- Head to the folder named after your website; this is where all the files related to your website are stored.
- Now, we are here specifically looking for the wp-settings.php file. This file consists of all the configurations, such as defining error logs and more.
- Tap on the file and choose the edit option to edit the wp-settings file.
- Look for the code with “WP_MEMORY_LIMIT,” it should have the default value of 32 bits. Change the 32 bits to 64 bits and save the changes to the file.
That’s it. Now, check if you are still facing the ERR Connection Timed Out error on your WordPress website. Ensure the browser cache is cleared if you are still facing the issue. If that doesn’t work, let’s hop on to the next solution.
Also read: 7 Tips to Fix Screenshot on Mac is Not Working
2. Increase the PHP Execution Time
Another technical instance when users face the “Err Connection Timed Out” error is there is a lesser maximum PHP execution time. Let’s make it easier for us to understand what execution time is and how you can use it to solve the issue.
The way the computing world works is in parallel and serial jobs. So, each process in the computing has a default time limit, after which the processing unit takes up the next job. So, if the PHP file is still executing while the time is up, the process will end abruptly, and you can see the “Timed Out” error on your screen.
To tackle this, we need to increase the maximum execution time for our website’s PHP file; here are some steps you can follow,
- Login to the hosting service where your website is hosted and look for the file manager option. You can alternatively also use the FTP interface on your WordPress website.
- Now, look for the subfolder with the name of your website; this is where all your files are stored.
- We are here specifically looking for the php.ini file; tap on it and then click on the “Edit” button to edit the file.
- Look for the code max_execution_time, and by default, it is set to 30 seconds. We are going to change it to 60 seconds and save the file.
Once the file is saved, let’s check if the “Err Connection Timed Out” error is solved on your WordPress website. If still facing the error, ensure to clear the browser cache or use a different browser and try again. If this doesn’t work for you, it is likely the issue with the buggy theme or malfunctioned plugins.
Also read: One AirPod is Louder than the Other? Here is How to Fix it.
3. Check for the Plugins
Malfunctioned plugins are a common thing, and they could cause serious trouble with your website. A few of the famous issues on WordPress due to faulty plugins are JSON response error, 403 forbidden error, or even the critical error that can bring down your website.
Most users think a faulty plugin can only be a new plugin, but that’s not completely true. A lot of famous and most-used plugins can also be faulty, and there can be several reasons for this. For instance, an incompatible theme with the plugin, an outdated version, or an unstable upgraded version of the plugin.
Whatsoever the reason may be, it can still cause an issue like the Err Connection Timed Out error, and to tackle this, the only solution is using the “Deactivation” method. Or trial and error method in simple terms.
Here are some steps you can follow,
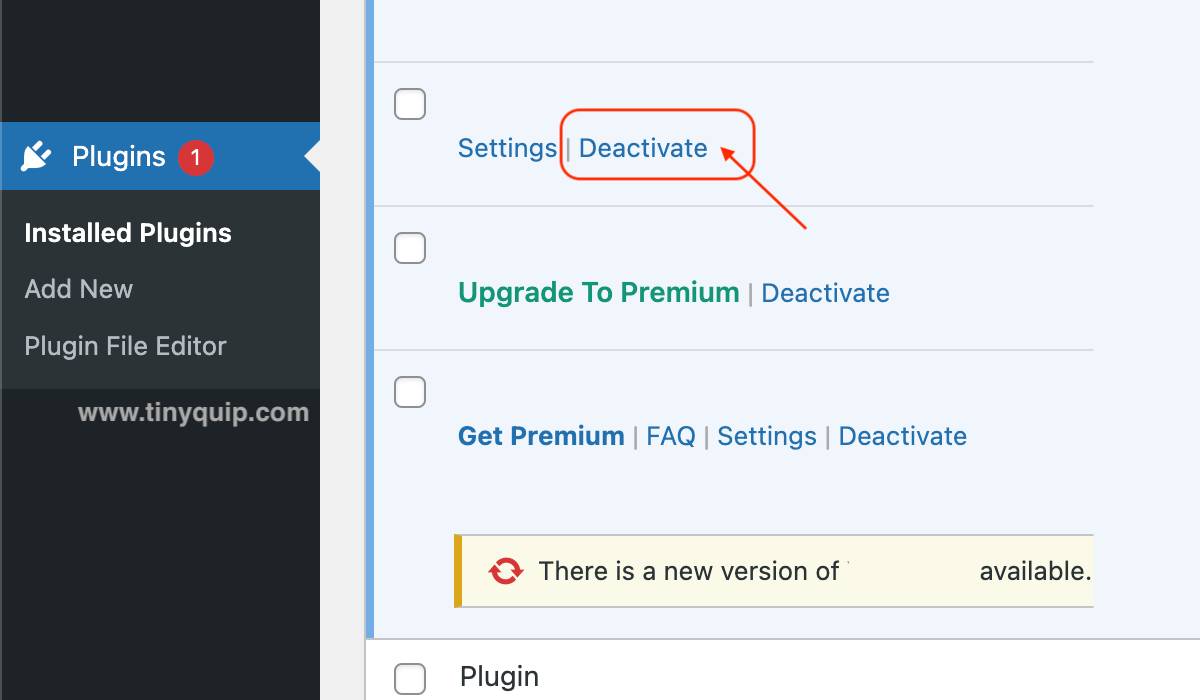
- Open the WordPress dashboard and tap on the “plugins” option from the left menu of the screen.
- Here you will find the list of all the plugins that are installed on your website, but one of them is conflicting and needs to be deactivated.
- Hover the cursor on each plugin, and you can find the “deactivate” option; tap on it.

- After deactivating each plugin, check your website to see if you still face the issue.
If your WordPress dashboard is not accessible due to an Err Connection Timed Out error, you can also use the hosting server and get the issue resolved.
Here are the steps you can follow,
- Connect to your WordPress hosting platform using an FTP service as we need to access the “File Manager.”
- Navigate to the WordPress installation location for your website and look for the “Plugins” sub-folder under the wp-content folder.
- Rename the plugins folder to “plugins.deactivate,” and when you do this, WordPress won’t be able to find the plugins and automatically set them to deactivate.
- Once done, check back if you are still facing the critical error on your WordPress website, and if you are not having the issue, it is the plugins that are causing the trouble.
- You should now be able to access the WP dashboard and then activate the core plugins. Also, you need to rename the “plugins.deactivate” folder to “plugins” for WordPress to access them. This is the most crucial step.
This should help you resolve the issue on your WordPress website with the “Err Connection Timed Out” error. But what if the entire theme on your website is buggy? In such a case, you need to change your active theme to default and check if the issue still exists.
4. Change your WordPress Theme to Default
Changing your WordPress theme to default can be really heartbreaking; at least, it is for me. Most of your website customizations, appearance, and design can change, and you might need to redo the edits. But on a larger picture, if your website is not accessible to your audience, none of your edits and looks will work.
Buggy theme can also lead to other issues on your WordPress website, and changing it to default can solve most issues.
Here is how you can change the WordPress theme to default,
- Open the WordPress dashboard and tap on the “appearance” option.
- On the right of the screen, you can find all the themes that you have installed; look for the default theme, and tap on it, followed by the “Activate” button to activate it.
- If you have a fresh, updated copy of the current theme, tap on the “Add New” option from the top of the theme’s grid and then click on the “Upload Theme” button.
- Now, upload the theme and wait for it to install. Once done, activate it and check if the issue exists.
However, if your website is not accessible at all, you can also use the hosting server to change the website theme to default.
- Connect to your WordPress hosting platform using an FTP service as we need to access the “File Manager.”
- Navigate to the WordPress installation location for your website and look for the “Themes” sub-folder under the wp-content folder.
- Download all the themes that you installed earlier using the download option; you can also download the entire folder (For backup purposes).
- After downloading the theme folder, you can delete the existing themes and upload the default WordPress theme.
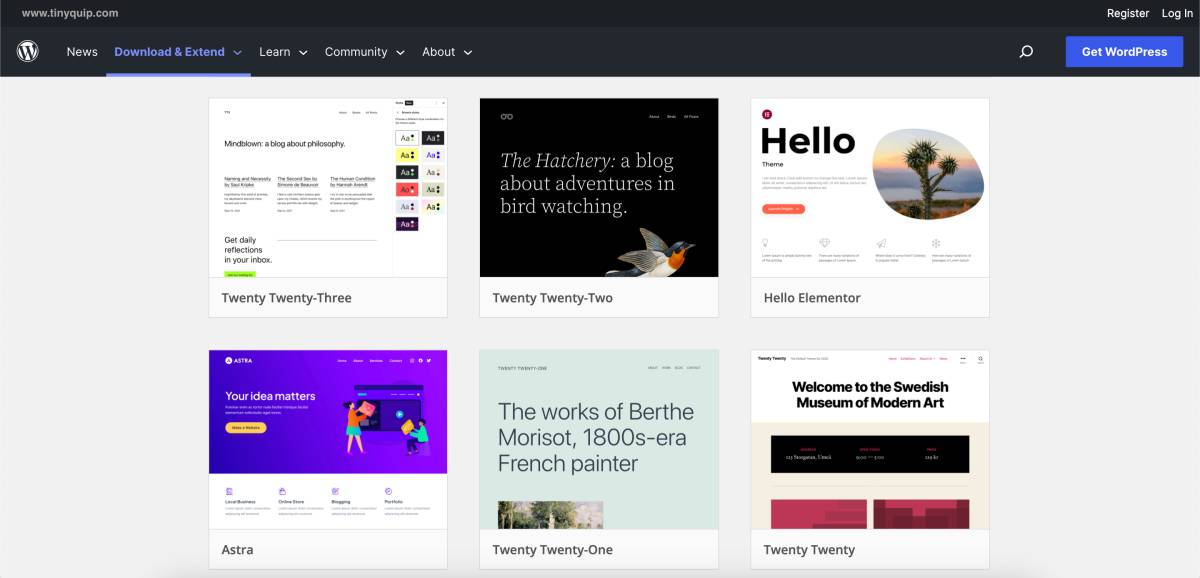
- To download the default theme, navigate to the “Themes” section on the wordpress.org website and download the default twenty-twenty theme.
- After the upload, check back on your WordPress website using the browser in incognito mode and check the Err Connection Timed Out error.
5. Code Changes on Core Pages
While most plugins and themes can make changes to your WordPress website, and these changes are reversed when the plugins are themes are deactivated, there are at times when such things can leave a permanent code change, especially on the core pages.
In such a case, it can be a really hard job to find such a conflicting code among thousands of lines of code. Messing such hard codes without appropriate technical knowledge can break the website entirely. So you can enable error logs to record the error on your website and know what lines of codes are causing an issue. You can refer to this guide on how to check error logs on your WordPress website.
That’s it. This should help you solve the “Err Connection Timed Out” error on your WordPress website. But in some cases, it can be a totally tricky situation that needs technical assistance.
Also read: Gmail Notifications Not Working? Check This | Android and iPhone
6. Technical Assistance to the Rescue
When you are facing an “Err Connection Timed Out” error on your WordPress website and none of the handy solutions listed above work, you need to get in touch with your hosting provider. Usually, there is a dedicated support team with your hosting service that checks and solves WordPress issues for you. While on most of the hosting servers, this is a free service, a few of them might charge you for such operations.
All you need to do is log in to your hosting provider and generate a support ticket. Ensure to briefly mention the issue and also mention all the solutions that you have already tried; this should save some time and help in getting faster solutions. Usually, it takes only a couple of hours before the issue is resolved, depending on the number of support requests.
You may also like to read,
- 13 Steps to Fix the NSES-500 Error Code on Netflix | NSES-UHX
- Clubhouse App Not Working? Here are 10 Things to Fix
- How to Fix Error Code 0X0003 on GeForce Experience | Windows
Frequently Asked Questions [FAQs]
There can be a couple of reasons for this, but mostly the major ones are lesser maximum execution time and memory limit for the PHP files. It can also be due to faulty or buggy themes and plugins that need special attention.
Navigate to the hosting provider and log in using your credentials, open the file manager option, and navigate to the subfolder with your website name. Now, you will here find the wp-settings file and edit the code that defines the memory limit from the default 32 bits to 64 bits.
Navigate to the hosting provider and log in using your credentials, open the file manager option, and navigate to the subfolder with your website name. Look for the php.ini file and edit the code “Execution time” to 60 seconds.
Before You Leave
Get Our Prime Content Delivered to your Inbox for Free!! Join the Ever-Growing Community… Right Now.
Give this article a quick share,
Wrapping up: ERR Connection Timed Out on WordPress
Always ensure you are not running untested plugins and themes or ones from untrusted sources. Such an addition to your WordPress website can cause major issues such as the ERR Connection Timed Out error and leave your website inaccessible. It is always best to keep an error log that can help you determine what part of the code or website is causing an issue and comes in handy most times when your website looks fine, but some part of it is vulnerable.
Get Powerful Managed WordPress Hosting
Check out Kinsta WordPress Managed Servers for powerful cloud server performance, high page speed, and managed deliverability.
- Cloud servers with your choice of data center among 35 locations
- HTTP/3 quick support
- Malware security pledge
- Staging environments, site management, and optimization tools
- Cloudflare Enterprise and CDN
I hope to have helped you with how to solve the “Err Connection Timed Out” issue in this handy guide; if you like it or have questions about it, do mention them in the comment section below. If you like this article, do give this a quick share on your social media handles, and do tag us. Also, join our Telegram channel, Facebook page, and Twitter to never miss a quick update.