Want the best and free screen recorders for your Linux or Ubuntu machine? Check out this list.
When you are working on a Linux kind of operating system, there are times when you need to screen record. Maybe you want to record tutorials or show your current projects on platforms like YouTube, but the question is, are there any default screen recorders on the Linux OS and if they work with good-quality of frames? Linux operating system like Kali Linux has a default screen recorder, but a few others are missing out on this. So, here is our list of the 10 best and free screen recorders for Linux that work in actuality, have dozens of features, and have a better frame rate and quality.
Also read: How to Download & Install VirtualBox in Ubuntu?
10 Best Screen Recorders for Linux/Ubuntu
Linux being more of a command-based operating system, misses out on features like an app for screen recording. You can easily find hundreds of screen recorders on Windows, but it is difficult to find some of the best for Linux. The paid recorders are restrictive and don’t work all the time, and on the other hand, some free screen recorders are poor in quality of frames and are time-based. In this article, we suggest some of the best and free screen recorders on Linux that are both best in quality and have no restrictive zones. So, let’s discuss them one after the other without wasting any time.
1. Kazam: Screenshot & Screen Recording on Linux
Features
- Multiple video output formats.
- Select screen area, window, or record full screen.
- Supports microphone input.
- Recording timer for pre-record preparations.
- Allows taking a screenshot.
- Cursor movements are recorded.
- More features are added.
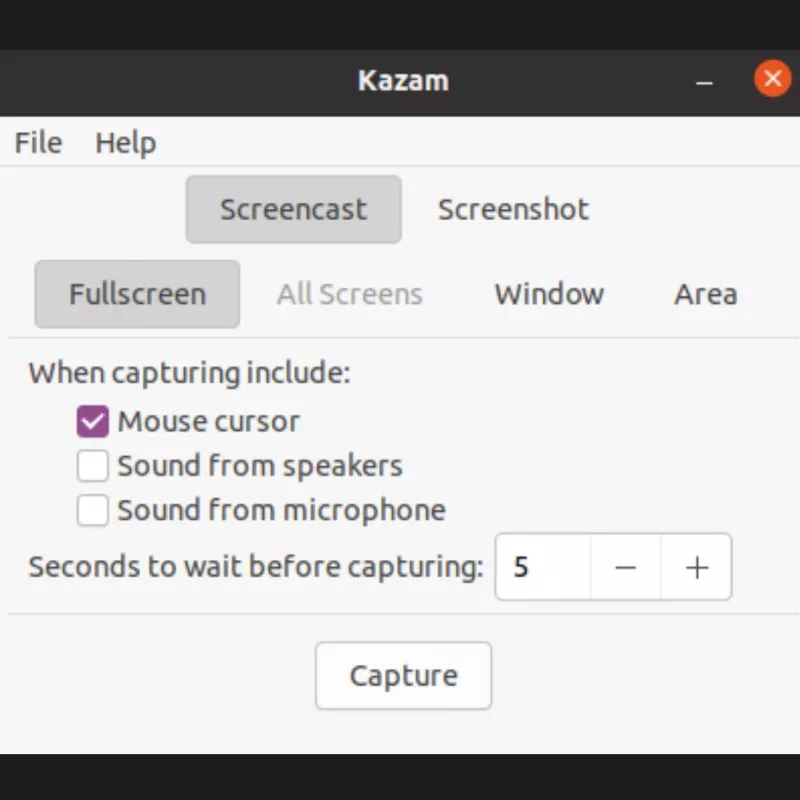
Kazam is one of the easy-to-use and handy tools for screen recording on your Linux-based systems. The tool can record specific areas, windows, or the entire screen as per convenience, which makes the tool much more comfortable to use. Sometimes you don’t want to record the entire screen; In this situation, you can select the working window and screen record it without cropping it later.
If you are recording the screen for tutorial purposes, there is a good chance you will be using a microphone for voiceover. Some of the free screen recorders don’t support the voice recording feature, and Kazam is a total savior in this situation. You can record voice from multiple audio sources, and the best part is the recording quality doesn’t deteriorate.
Let’s address the most important part of the screen recording; the video quality. When you are screen recording using free recorders, you can find most of the software reduces the quality or compress the video. However, this is not the case with the Kazam screen recorder; You can find the high definition video quality despite being free-to-use software. This is also why Kazam is one of the best screen recorders for Linux and is the most preferable choice.
The only disadvantage of using Kazam is the lack of webcam support which could help the users to record their faces while screen recording.
Also read: How to Install WSL 2 on Windows 10? | Step-by-Step Guide
How to Install Kazam Screen Recorder on Linux?
Linux is more of a command-based UI than a GUI like Windows, and almost all the scripts are installed using the command-line interface. Likewise to the other scripts, Kazam is installed using the “apt” command on your Linux computer with “sudo” or “root” permissions.
To install Kazam on your Ubuntu, Kali, RedHat, or other Linux systems, use the following code:
sudo apt install kazamEnsure the “apt” is updated on your workstation and there is sufficient internet bandwidth to download and install scripts. Though downloading and installing the scripts on Linux doesn’t require faster connections, it is still better to have one. If you are unsure, you can check Fast or SpeedTest to verify your speed and then get a better Ethernet cable or WiFi speed booster to make your connection faster.
2. OBS (Open Broadcast Software)
Features
- Multiple screens.
- It allows you to record in the highest video quality, such as 1080p.
- Filters on video support.
- Live stream your video on multiple platforms.
- Allows screen recording from multiple video sources.
- Support for multiple audio sources.
- Built-in audio mixers and filters.
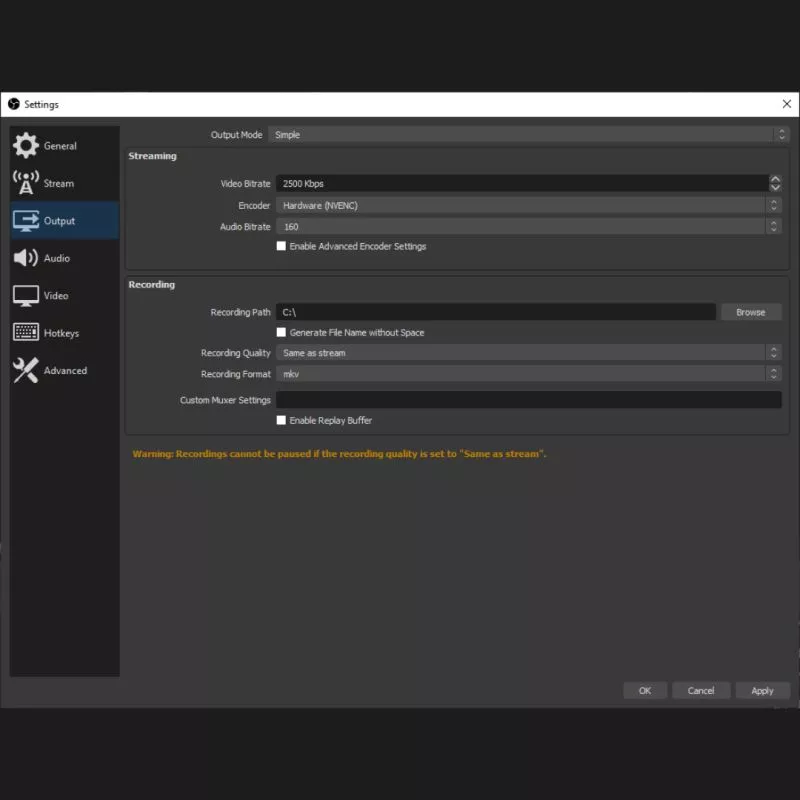
OBS (Open Broadcast Software) is one of the most powerful screens and face recordings for Linux, Windows, and Mac users. The tool has a bunch of great features that are mainly used by streamers to play live games live on their social media platforms, such as YouTube. Apart from living to stream, the users can record their screen for various purposes, such as a tutorial, support, or technical outcome of certain testing on Linux OS. The best part is the OBS software allows you to record your screen in 1080p, which defines the top quality of the video and is supported by maximum video devices such as streaming platforms such as Twitch TV.
The OBS has multiple video and audio sources which allows you to record multiple sources together on a single screen. This is helpful when you are recording a Linux tutorial and helps in creating amazing screen-recorded videos.
There are only two disadvantages to using an OBS screen recorder for Linux; the first disadvantage is the technical aspect, such as a lot more professional options, which may take some time to understand. Secondly, the software requires a lot of CPU resources, or you may start experiencing problems with using the software.
How to Install OBS (Open Broadcast Software) on Linux?
OBS can be installed using the snap store or by using the PPA commands; For us, the most convenient way to install an OBS screen recorder for Linux is by using the PPA command. Below are the commands:
Before installing OBS studio, we need to install FFmpeg;
sudo apt install ffmpegAfter installing FFmpeg, we can install the OBS studio using the “PPA” and “apt” commands. Ensure you have sufficient space on your Linux system and are connected to a fast internet connection. Additionally, you can use a WiFi speed booster to enhance your internet connectivity.
sudo add-apt-repository ppa:obsproject/obs-studio
sudo apt update
sudo apt install obs-studio
The first step is to install the OBS project/repository by using the PPA command, then use the “apt” command to install the OBS studio. It is important to note that OBS requires a lot of resources and if you are not running some of the top CPU specifications such as graphics card, RAM, and chipset; you will eventually find the software to lag and not respond. However, if you manage the resources, this is the best software for streaming and screen recording.
Also read: How to Live Stream Games using Streamlabs OBS?
3. SimpleScreenRecorder: Screen Record on Linux
Features
- Choose the screen, area, or window you wish to record.
- Multiple audio source options.
- Live preview the video while screen recording.
- Adjust the frame rate as per needs.
- Allows recording using a webcam.
- Select or deselect recording cursor movements.
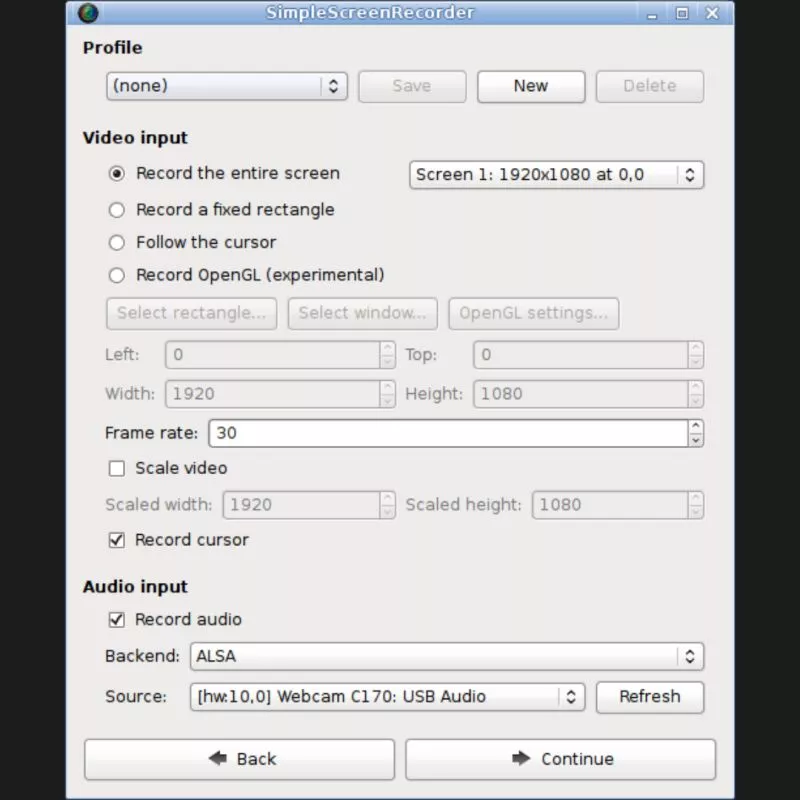
SimpleScreenRecorder is one of our favorite scripts to record screens on Linux and Linux-based computers. The tool is loaded with dozens of features making screen recording much more efficient and easy while maintaining the user needs. Starting with the screen area, you can record a specific window or entire screen or select an area and only record that part. This is useful when recording the screen to show an output or preparing a YouTube video tutorial on Linux.
Apart from the multiple screen recording areas, you can also record with multiple audio sources. Be it an internal microphone, plugged-in audio input, or other audio input sources; it records all with the SimpleScreenRecorder.
One of our favorite features is you can live preview your screen recording and recapture the screen if required; this is a feature that is rarely available on any screen recording software, and SimpleScreenRecorder does it smoothly and perfectly. Moreover, another feature that most of the other screen recorders miss out on is the frame rate. Using SimpleScreenRecorder, you can adjust the frame rate while recording the screen on your Linux computers like a professional camera and video editor. It is one of the best professional screen recorders for Linux and is a must-have.
How to Install SimpleScreenRecorder on Linux?
SimpleScreenRecorder is to download and install on Linux or Ubuntu systems using the “apt” command. The apt command allows you to install third-party scripts using a single or two lines of command.
We use “apt” to install SimpleScreenRecorder using the following command,
sudo apt install simplescreenrecorderIt is important to ensure the “apt” command is updated to the latest version and that you provide the root permissions while installing the scripts. The root permission allows the command to install on the main block of the memory and makes it easily accessible for you and other users.
Also read: How to Enable Google Dark Mode on Android and IOS Devices?
4. Peek: Screen Recording on Linux
Features
- Allows multiple video outputs MP4, WebM, APNG, and Gif.
- Create a gif video from the screen recording.
- Adjust video frame rate.
- Resize the window as per the need.
- Easy to use graphical interface.
Peek screen recorder is one of the fancy screen recorders for Linux, which perfectly fits the need for recording. This lightweight tool comes in handy when you want to record your screen but don’t want to install bulky software. You can record the entire screen or select a specific area to record and then save it in multiple formats, such as MP4, Gif, APNG, and WebM.
Despite being a lightweight screen recording tool, Peek allows its users to record the screen in different frame rates and adjust it as per needs. Apart from this, the tool is easy to use with no need to use the command-line interface. A simple GUI with limited options allows you to easily record the screen without breaking your head.
How to Install Peek Screen Recorder on Linux?
Installing the Peek screen recorder on Linux is slightly different from the other screen recorders; Here, you can either install Peek from its GitHub repository or use the PPA command.
In the following section, we install the Peek screen recorder using the PPA command,
sudo add-apt-repository ppa:peek-developers/stable
sudo apt update
sudo apt install peek
First, we add the stable Peek repository to our Linux system using the PPA command and then install the Peek screen recorder using the “apt” command. Additionally, it is a good practice to keep your apt updated as it smoothens the installation and the files are correctly installed. Once done, the Peek screen recorder is successfully added to your Linux.
Also read: Does Walmart Take Apple Pay?
5. VokoscreenNG: Screen Recording on Linux
Features
- Record the entire screen, window, or specific area.
- Magnification and scale can be adjusted.
- Delay timer.
- Adjust the microphone and other audio inputs.
- Tweak video quality and frame rates.
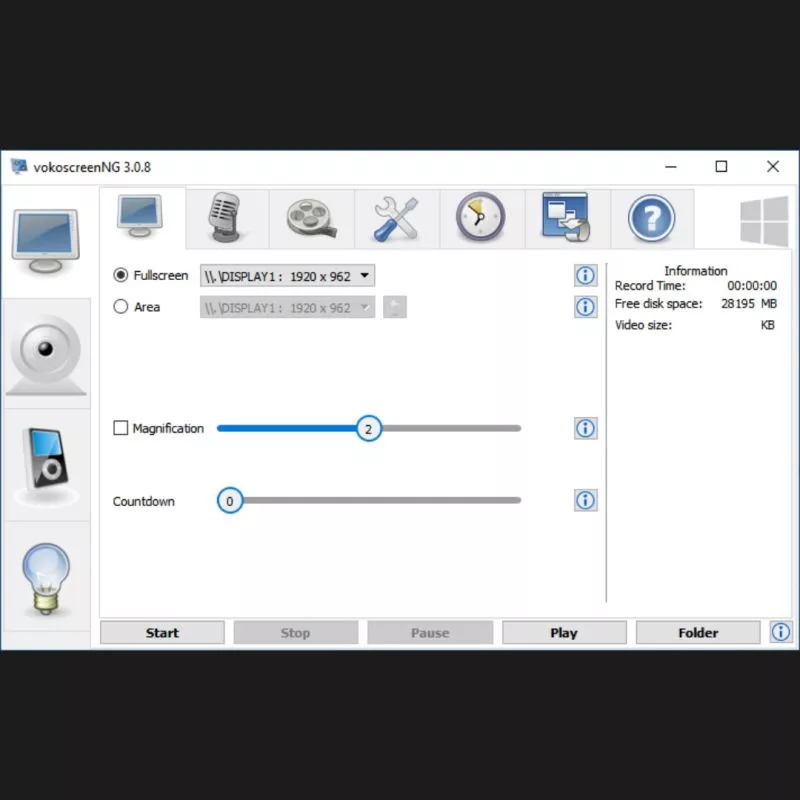
VokoscreenNG is the new generation of screen recording, which simplifies the task and allows you to screen record your Linux workspace as per your needs. This screen recorder is perfect for those who want to tweak the video quality and want to adjust the output video of the screen recorder. However, this would have been a perfect tool if it had the option to blur the areas of the screen recording, which might push you to edit the video afterward.
There are several other options while screen recording, such as adjusting the magnification and scale; this is something most of the top screen recorders miss out on. Usually, the font size on the command-line interface is small, and after screen recording the entire screen, you may find it hard to read the commands and suffer more if the video is later compressed. A magnification option helps in zooming in the window for a particular time frame and then zooming out as per your need and convenience.
Additionally, there are options to record the audio from multiple sources, which makes recording the sound more of an easy task. You might want to use a professional microphone or a studio set up for easy recording tutorials for YouTube and other platforms.
Also read: AMOLED vs. OLED | What is the Difference and Which is the Best?
How to Install VokoscreenNG Screen Recorder on Linux?
Installing the VokoscreenNG screen recorder is slightly different among Linux platforms; You can install it on Ubuntu-based systems using the PPA and apt commands, while Fedora and OpenSUSE use “dnf” and “zypper” for installation. If you are unaware of how to install VokoscreenNG on Fedora, OpenSUSE, or Ubuntu-based systems, below are the commands for you.
Installing VokoscreenNG on OpenSUSE Systems
sudo zypper install vokoscreenNGHere, we have first used the “Sudo” parameter to set the permissions to install on Root. Later, we installed the VokoscreenNG screen recorder using the Zypper command. It is simple and easy but requires an active and fast internet connection for faster installation. Once done, you can run the VokoscreenNG screen recorder and start using it to record the screen on your Linux system.
VokoscreeenNG Screen Recorder on Ubuntu-Based Systems
sudo add-apt-repository ppa:ubuntuhandbook1/apps
sudo apt update
sudo apt install vokoscreen-ng
For installing the VokoscreenNG screen recorder, we use the PPA commands to first add the repository and then use the “apt” command to install the file. Here, the repository is directly taken from the ubunuthandbook unofficial set of apps; however, it is similar to adding repositories from Git and needs no special addition of commands.
Install VokoscreenNG Screen Recorder on Fedora
sudo dnf install vokoscreenNGSimilar to OpenSUSE systems, we install the VokoscreenNG screen recorder on Fedora by first allowing the root permissions and then installing using the “dnf” command than “zypper.”
Also read: How to Rename Files and Directories in Linux?
6. Gtk-recordMyDesktop
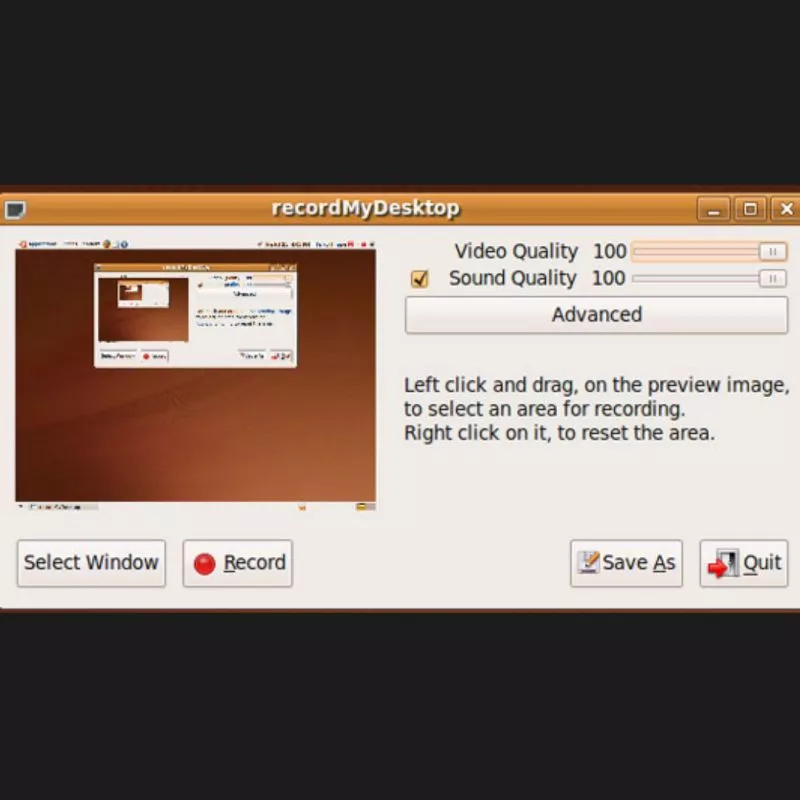
Features
- Output video tweaking options.
- Lightweight tool.
- It can be used from the command-line interface.
- Records single window.
- Advanced video options.
Despite being discontinued, Gtk-recordMyDesktop is simple to use and one of the best screen recorders for Linux. The tool has limited features, which makes it one best for being specific to recording the screen and not diversifying the screen recording options. However, there are several restrictions, such as no options for webcam recording, limited video output formats, and a poor GUI interface.
The tool is no longer actively supported and developed, yet if you are a hardcore command-line user and want to record a screen using commands; this is the option to shoot your shot at. In our opinion, you can skip this option.
How to Install Gtk-recordMyDesktop on Linux?
Gtk-recordMyDesktop may not be available on the latest Linux distro’s, but you can try installing it using the “apt” command. The apt command requires you to allow the sudo permissions to install in the root directory. This also makes the screen recorder available for all Linux users.
sudo apt install gtk-recordmydesktopAlso read: How to check the version of Linux? Check Linux Version
7. ScreenStudio
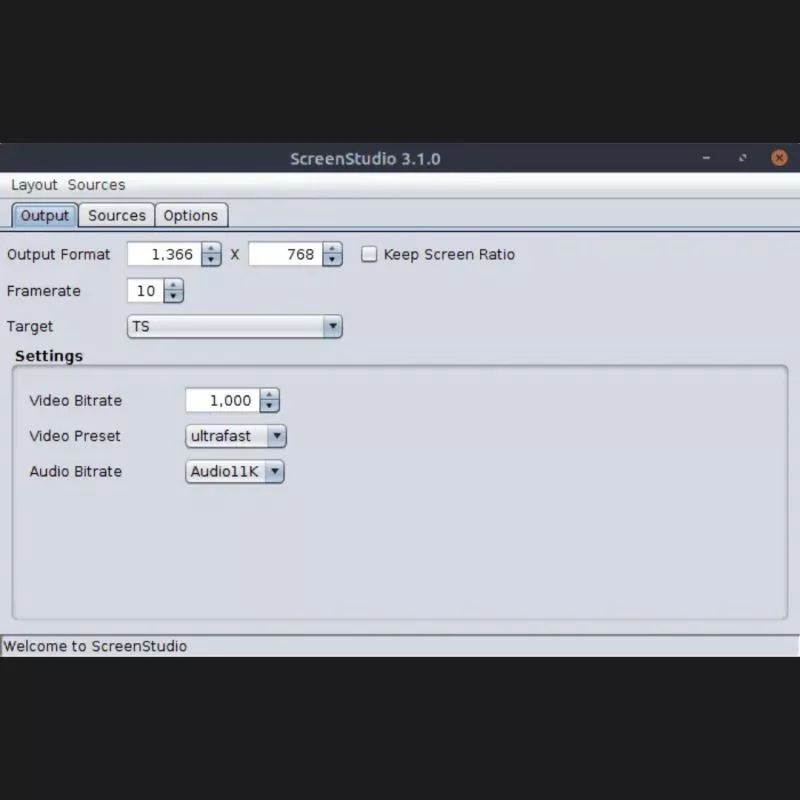
Features
- Supports webcam recording.
- Multiple audio and video sources.
- Stream support like OBS.
- Advance configuration options.
- Cross-platform interface.
ScreenStudio is one of the most liked tools when it comes to screen recording, as it is just as powerful as the OBS studio. It lacks some of the features, but with advanced configurations and streaming capabilities, you can stream on multiple platforms like Twitch TV.
Likewise to the OBS screen recorder for Linux, you get options to use multiple audio and video sources on a single screen; most of the tools lack this feature, but ScreenStudio being a lightweight tool, has managed to get this on board. Apart from multiple audio sources, you can also include audio and video from the webcam; this allows you to set up the face cam while you are explaining something from the screen.
The only disadvantage of using ScreenStudio is the requirement of JRE 8.0 and above installed on your Linux or other platforms where you are installing the software. Additionally, this tool is no longer developed and supported, which marks its usage conditions as non-existence; However, you can shoot your shot and try if the screen recorder works for you.
Also read: How to Delete Files and Directories in Linux – Simple Guide
How to Install ScreenStudio on Linux?
Likewise, to OBS studio and most of the other screen recorders for Linux, the tool is installed on the Linux systems using the “PPA” and “apt” commands. For this, we also need to ensure using the updated “apt” version to install the software correctly and have JRE 8.0 and above pre-installed on your computer.
For installation of JRE 8.0 and above, you can refer to the article from the official Oracle documentation.
Once you have completed the installation of JRE 8.0 and above on your Linux OS, you can use the PPA commands as shown below to install the ScreenStudio software.
sudo add-apt-repository ppa:soylent-tv/screenstudio
sudo apt update
sudo apt install screenstudio
8. Gifine: Gif Screen Recorder for Linux
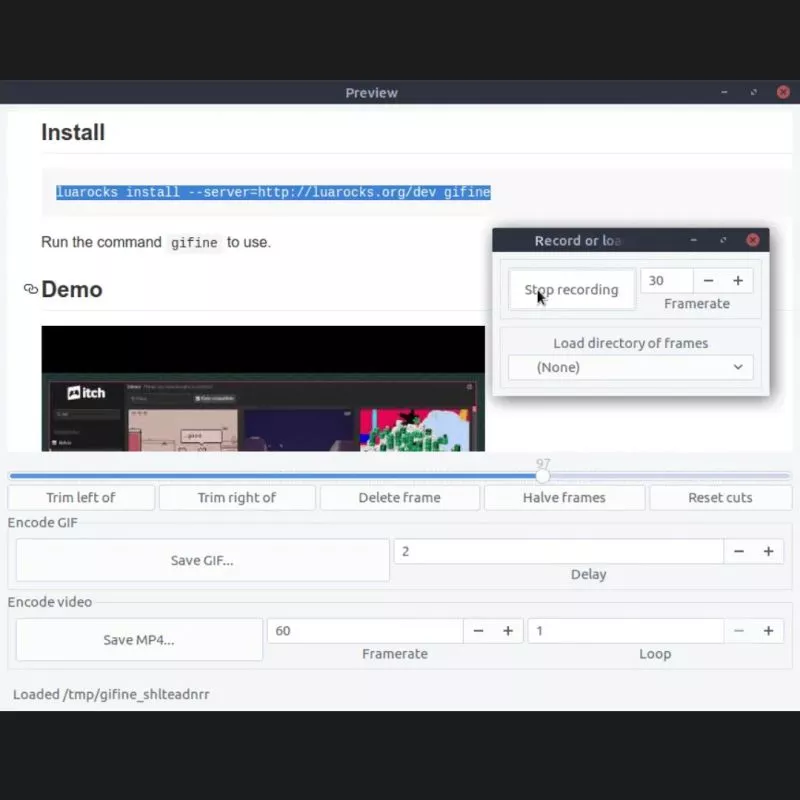
Features
- Gif and MP4 video format.
- Trimming options.
- Delay timer.
- Adjust framerate.
- Save videos and gifs to preferred directories.
Gifine is a lot more similar to the Peek gif screen recorder tool; however, there are more features than Peek, which makes Gifine one of the better options. Likewise, to Peek, you can screen record your Linux system and save it either in gif or MP4 video format, but here you get a bunch of additional tools. The first and foremost feature we loved about Gifine is the trimming option which allows the user to trim the videos directly while saving rather than going back to the video editing tools.
Secondly, there is a delay timer that allows you to prepare your screen before you start recording it, which comes in handy while preparing video tutorials on Linux. You can also adjust the framerate at your convenience and set the video quality.
How to Install Gifine Screen Recorder on Linux?
Unlike Peek or any other screen recorder on the list, installing Gifine screen recorder is lengthy on platforms like Linux. Here, you cannot directly start with the PPA commands or use the “apt” command and install Gifine; you first need to clone the git repository, configure the bootstrap and configuration command and then use the “make” command to create the installation file.
Once done, you can then use the “apt” command and install the Gifine screen recorder using the specified server directory/location. To make the installation easier, carefully follow the below commands.
git clone --depth 1 https://github.com/lolilolicon/xrectsel.git
cd xrectsel
./bootstrap && ./configure
sudo make install
sudo apt install gifsicle luarocks libgirepository1.0-dev
sudo luarocks install --server=http://luarocks.org/dev gifine
Note: Do not copy and paste the entire command at once on your command-line interface. Each line in the above code box is a command and needs to be followed one after the other.
Also read: How To Zip A Folder In Linux Distribution Using Compression Levels
9. Green Recorder
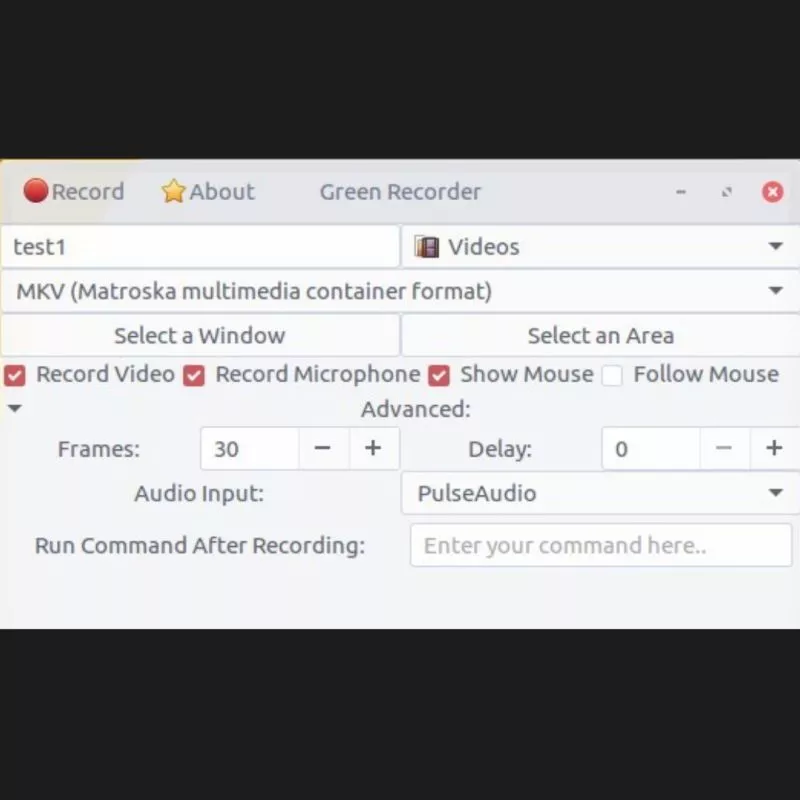
Features
- Multiple video output formats.
- Save your preferences.
- Support for creating Gif videos.
- It can be installed using PPA commands.
Green Recorder was one of the earliest screen recorders for Linux systems and still works as one of the best options to record screens with a bunch of advanced options. The tool is no longer supported or developed but has features that the best screen recorders fail to have; one such feature is the “save preferences” for the next time. When you are regularly screen recording, you would hate to set the same configuration each time, and in that case, you can save your preferences and be ready to record on the go.
Additionally, there are several video output formats, such as Mkv, MP4, WebM, AVI, and GIF, which allows you to create screen recording for multiple platforms. Though the software is no longer developed, you can still use it, and this works better than most of the other screen recorders.
How to Install Green Recorder on Linux?
To install Green Recorder on Linux systems, we first need to install the repository using the PPA command and then use the “apt” command to install the software. This is fairly similar to most of the other software on the list, and the steps are,
sudo add-apt-repository ppa:fossproject/ppa
sudo apt update
sudo apt install green-recorder
Also read: How to Start, Stop and Restart Apache Ubuntu?
10. Byzanz Screen Recorder
Features
- Single application window recording.
- Screen record Linux desktop in multiple video formats.
- Specify video duration to pre-trim the video.
- Customize the height and width of the video once done.
- Outdated user interface.
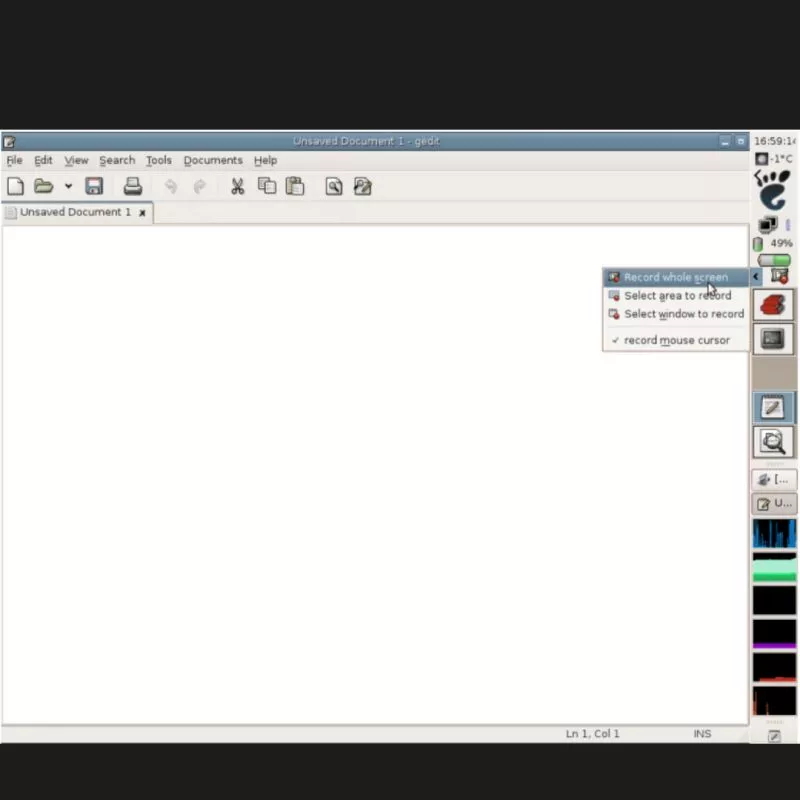
Byzanz is a command-line-based screen recorder that allows you to screen record both audio and video on your Linux desktop. Despite having a poor user interface, the software is one of the considerable choices when you wish to record your desktop screen in specific ratios and later save them in multiple video formats.
What we loved the most was the time duration which can be applied before starting the screen recording, and only that duration is recorded. This screen recorder for Linux is simple but works efficiently.
How to Install Byzanz Screen Recorder on Linux?
Installing the Byzanz screen recorder is easy and can be done using the “apt” command. Unlike most of the other screen recorders, installing the Byzanz screen recorder doesn’t need to use the PPA commands. Below is the line of command you can use to install the Byzanz screen recorder on Linux-based systems.
$ sudo apt-get install ByzanzIt is recommended that you have a faster internet connection and a good amount of space on your Linux PC to install the software. There are certain minimum requirements to install this screen recorder.
Also read: Best Accessories for AirTags: Key Rings, Straps, Loops & More
Download: 10 Best and Free Screen Recorders for Linux
| Screen Recorders for Linux | Rating | Download |
|---|---|---|
| Kazam | 4.7/5 | Download Kazam |
| OBS (Open Broadcast Software) | 4.9/5 | Get OBS for Linux |
| SimpleScreenRecorder | 4.5/5 | Get SimpleScreenRecorder |
| Peek | 3.7.5 | Get Peek |
| Vokoscreen | 4.4/5 | Get Vokoscreen |
| Gtk-recordMyDesktop | 4.0/5 | Get Git-recordMyDesktop |
| ScreenStudio | 4.5/5 | Get ScreenStudio |
| Gifine | 3.8/5 | Get Gifine |
| Green Recorder | 4.0/5 | Download Green Recorder |
| Byzanz-Record | 3.5/5 | Get Byzanz-Record |
Also read: 10 Best Google Photos Alternatives for Android & iOS
Frequently Asked Questions
Yes, you can screen record on Linux, and a screen recorder such as “Kazam” is by default installed on Linux operating systems like Kali Linux and Ubuntu.
There are several best screen recorders for Ubuntu; Some of the top choices are Kazam, OBS studio, ScreenRec, SimpleScreenRecorder, and many more.
Byzanz and gtk-recordMyDesktop are two of the best command-line screen recorders for Linux-based operating systems like Ubuntu, Kali Linux, CentOS, and more.
You may also like,
- How to Fix Google Play Services Keeps Stopping
- 9 Ways to Fix HTTP Error 403 on Google Chrome Browser [Solved]
- How to Fix Among Us Disconnected from the Server Error | Android, IOS, & Steam
Conclusion | Best and Free Screen Recorders for Linux
These are some of the best and free screen recorders for Linux; We highly recommend using screen recorders such as Kazam and OBS studio, which do most of the work. However, there are a few tools for recording videos in Gif format to share on multiple other platforms. If you have any questions, you can drop them in the comment section.
Also, let us know your favorite among the best and free screen recorders for Linux. If you know any additional tools that fit this list perfectly, let us know in the comment section. Also, if you like this article, do give this a quick share on your social media handles and definitely tag us. Join our Telegram channel, Facebook page, and Twitter to never miss a quick update.


