Want to install WSL (Windows Subsystem for Linux) 2 on Windows 10? Here is a complete and simple step-by-step guide that will help you with the installation and the basics.
Normally, all the tech geeks and IT organisations promote using Virtual machines for using one operating system on another. This is mainly when you want to use Linux OS and want to keep running the Windows OS. A lot of other’s suggest using the dual boot for the same purposes. But Microsoft’s Windows have a new option for all the Linux users; the WSL (Windows Subsystem for Linux).
Windows Subsystem for Linux is a Windows creation that allows you to use command-line Linux directly on Windows OS, unmodified, without the overhead of a traditional virtual machine or dual boot setup.
WSL 2 is the second version of Windows Subsystem for Linux, which features increase file system performance and support full system call compatibility.

Benefits of Using Windows Subsystem for Linux
- Install GNU/Linux distributions of your choice.
- Use command-line operations such as grep, sed, awk or other ELF-64 libraries.
- Install other additional software using the GNU/Linux distribution package manager.
- Invoke Windows applications using a UNIX like a command-line shell.
- Invoke GNU/Linux operations on Windows OS.
- Run Bash shell scripts and GNU/Linux command-line applications, including:
Tools: vim, emacs, tmux
Languages: NodeJS, Javascript, Python, Ruby, C/C++, C# & F#, Rust, Go, etc.
Services: SSHD, MySQL, Apache, lighttpd, MongoDB, PostgreSQL.
How to Install WSL 2 on Windows 10
Microsoft’s plan with WSL 2 is to bring the core Linux into action without modifying the system. This is possible by giving the full function call capability, which Microsoft restricted in the original WSL. In addition, Windows Subsystem for Linux 2 introduces a faster, versatile, and diversified functions list. But this comes with a few restrictions; you need to have specific system requirements to install WSL 2 on your Windows 10 computer.
Requirements
- A computer with Hyper-V Virtualization support.
- Windows 10 May 2020 (2004), Windows 10 May 2019 (1903), or Windows 10 November 2019 (1909) or later.
If your computer meets these requirements, you can install the WSL2 seamlessly. But how do you install it? Here are the steps.
Installing WSL2 on Windows 10
There are 4 steps that are to be followed for successfully installing WSL2 on Windows 10 computer.
- Enable WSL 2
- Enable ‘Virtual Machine Platform’
- Set WSL 2 as the default
- Install a Linux distro
The following steps involve using a command-line interface, and it is important to be cautious about what you type. If you make errors, you might mess up the installation.
There are two ways of installing WSL 2 on a Windows 10 computer; the first way is using the GUI method, and the second way is using the PowerShell app. The PowerShell app can be found in the startup menu of Windows 10 and allows access to the core of Windows using the command-line type of interface.
We are going to use the PowerShell app as the process is faster and more generic. With the GUI version, we usually mess up and is a time-consuming process.
[Step 1] Enable WSL 2
Now, no matter which WSL version you wish to use, the first and most important step is to enable it. The first step is to enable WSL 2 on your Windows 10 computer. To enable the WSL on your Windows 10 computer, run PowerShell in administration mode and type the following command.
dism.exe /online /enable-feature /featurename:Microsoft-Windows-Subsystem-Linux /all /norestart
We are using a PowerShell command-line interface, so it is important to be sure not to mistype.
[Step 2] Enable ‘Virtual Machine Platform’
If you wish to enable WSL 1, you don’t have to install the virtual machine platform or set WSL as default. On the contrary, if you wish to use WSL2, it is mandatory to enable the virtual machine platform.
For those confusing a bit with the term Virtual Machine Platform, you don’t have to install software like VMWare. Enabling Virtual Machine Platform means enabling the Hyper-V and other platform integrations.
To enable Virtual Machine Platform on Windows 10 (2004)
- Open PowerShell as Administrator and run
dism.exe /online /enable-feature /featurename:VirtualMachinePlatform /all /norestart
To enable Virtual Machine Platform on Windows 10 (1903, 1909)
- open PowerShell as Administrator and run
Enable-WindowsOptionalFeature -Online -FeatureName VirtualMachinePlatform -NoRestart
Once you are done enabling Hyper-V on your Windows 10 computer; it is recommended to restart the computer to ensure the system is correctly configured.
[Step 3] Set WSL 2 as default
It is not mandatory to set WSL to default, but for WSL 2 (Version 2), it is important to configure the WSL2 as default. You cannot skip this step, and if you later wish to use the WSL, you can configure it with PowerShell.
To set WSL 2 as default,
- Open PowerShell as Administrator
- Type the following command
wsl --set-default-version 2
[Step 4] Installing Linux Distribution
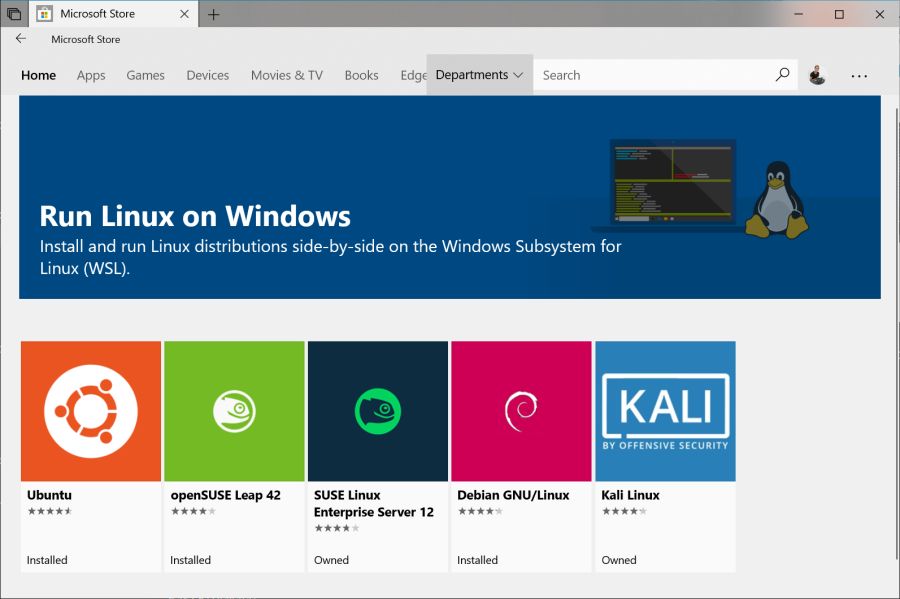
Once you have completed all the above three steps, the final step is to choose a Linux distribution and install it on the WSL 2 layer. There are several Linux distributions available on the Microsoft store; to name a few, Kali Linux, Ubuntu (20.04 LTS, 18.04 LTS), Open SUSE Leap 15.2, Debian, and a few more.
To get the Linux Distribution, go to Microsoft Store and Search for the Linux distribution you wish to install. We love Kali Linux, and we will install Kali Linux using the WSL 2; if you are new to Linux, you can install Ubuntu.
You can install either of the following, we have added the quick links below
If you wish to install other Linux distributions, you can visit the Microsoft Store.
Once you have installed the Linux distribution, you can find the shortcut added to the start-up menu. At first, you may find them to work slow, which is not much of the issue. Once done, you can confirm by checking the Linux distribution version.
Converting WSL 1 to WSL 2
Most of the users who have been using WSL 1 have a greater confusion on how to shift to WSL 2, and actually, it is not much big issue.
If you are using a certain Linux Distro in WSL 1 and want to convert to WSL 2, type the following command in the PowerShell.
wsl.exe --set-version Kali 2
Rename the “Kali” with the Linux distribution that you have installed. For example, replacing “Kali” with “Ubuntu” in the above code.
Also read: How to rename files and directories in Linux?
Comparing WSL 1 with WSL 2 – Which is the better version?

| Feature | WSL 1 | WSL 2 |
|---|---|---|
| Integration between Windows and Linux | Yes | Yes |
| Fast boot times | Yes | Yes |
| Small resource footprint compared to traditional Virtual Machines | Yes | Yes |
| Runs with current versions of VMware and VirtualBox | Yes | Yes |
| Managed VM | No | Yes |
| Full Linux Kernel | No | Yes |
| Full system call compatibility | No | Yes |
| Performance across OS file systems | Yes | No |
WSL 2 being a successor outperforms WSL 1 in several ways but fails when it is about the performance across OS fie systems. So, for faster performance speed, it is recommended to store files in WSL file system rather the home directory of the Windows OS.
For example, Use the Linux file system root directory:
\\wsl$\Ubuntu-18.04\home\<user name>\Project
With a few performance exceptions, you can use the WSL 2 on your Windows 10 computer. If you wish to convert back to WSL 1, you can easily do it with the PowerShell.
You may also like,
- How to Delete Files and Directories in Linux – Simple Guide
- How To Zip A Folder In Linux Distribution Using Compression Levels
Conclusion
These were a few simple steps to install WSL2 on Windows 10 computer. We did this with the help of the PowerShell command-line method, and you can alternatively use the GUI method. The above method is faster and helps you to work with converting WSL versions quickly. If you have any questions, do let us know in the comment section.


