Bored and troubled by using all those VPN options that don’t work? Want to create something geeky, like your very own VPN server for personal use while also securing your connection? I share it all in this handy guide – How to Create your own VPN Server using Raspberry Pi.
Quick Links
- Everything You Need to Turn Your Raspberry Pi into a VPN Server
- Using OpenVPN: The List of Features
- How to Create a VPN Server using Raspberry Pi and OpenVPN
- How to Use NordVPN with OpenVPN on your Raspberry Pi VPN Server Connections (Optional)
- Wrapping up: Creating Your Own VPN Server using Raspberry Pi and OpenVPN
A VPN server is great when you don’t want snoopers to look into your internet activity or see sensitive data. It is most common and likely, while you are reading this handy guide, there is someone out there spying on your connection and monitoring your activity. So, the best thing to do is use a VPN service like NordVPN, which is pretty much my favorite for all the good reasons.
While NordVPN is software available for most devices performing encryption and decryption, a VPN server acts like a system between your device and the rest of the internet.
They are great for most reasons, as they decrypt your messages from the internet, frequently change your IP address, and communicate them securely without having you pay for subscriptions or worry about VPN companies collecting your data. However, there are also disadvantages, such as not being able to hide behind thousands of other users, unblock a few geographic media content, or access hundreds of servers for seamless performance. You can do all these with a commercial VPN like NordVPN, but if you are thinking of something for personal privacy, this guide should be helpful to you.
Everything You Need to Turn Your Raspberry Pi into a VPN Server
- Raspberry Pi 4 (Older versions are fairly slow or do not support updated software)
- A microSD card (8GB or more recommended)
- An SD card reader or microSD card adapter to read and write microSD on your computer
- Access to internet
- A USB keyboard (Optional)
- Monitor with HDMI (Optional)
In this guide, we will be using OpenVPN to create our VPN server. Thankfully, you can use up to 2 concurrent connections for free with OpenVPN, but for more connections and features, you can pay as minimal as $7/mo for OpenVPN access servers.
You can also use WireGuard rather than OpenVPN, but it is relatively new, while OpenVPN is used by most prominent VPN services like NordVPN, ProtonVPN, Private Internet Access, and more. You can read a gist about these VPN protocols in my handy guide on VPN Tunneling.
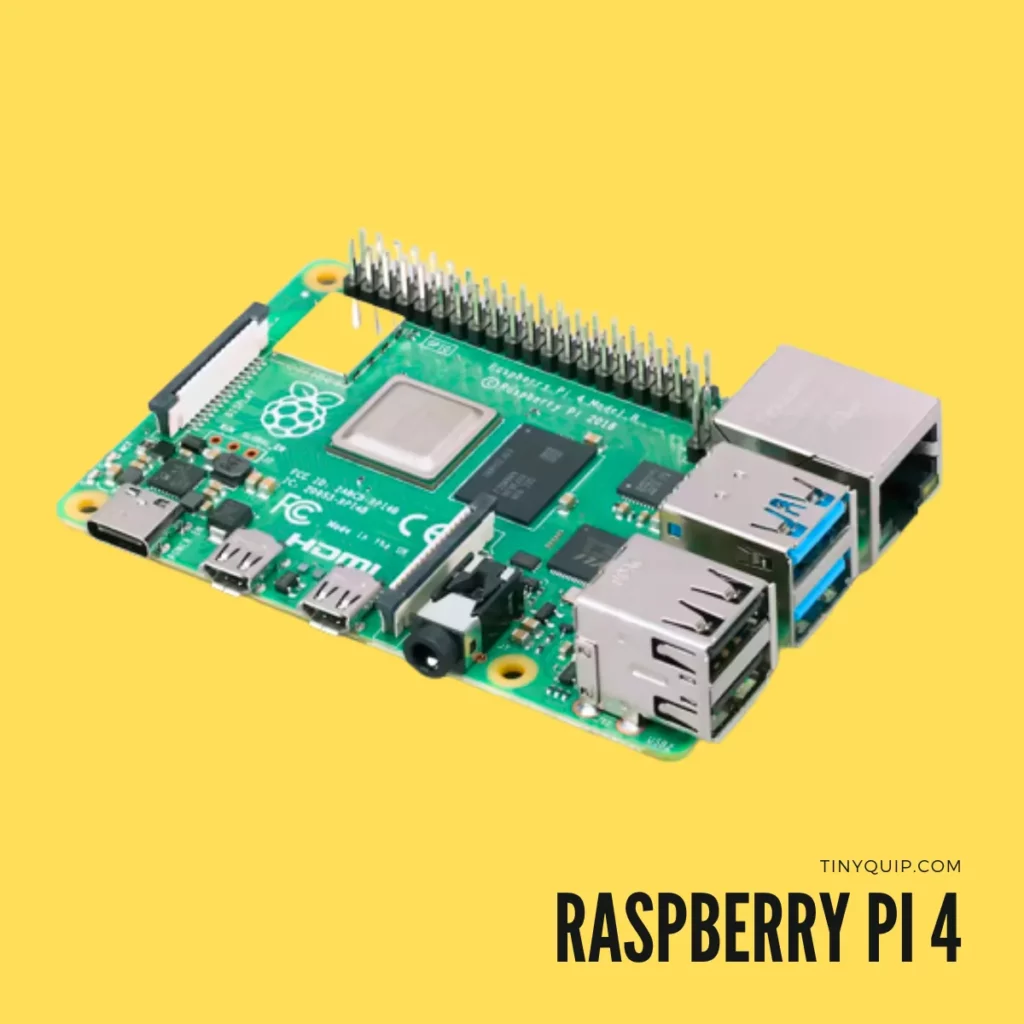
Raspberry Pi 4
- Quad-core Cortex-A72 (ARM v8) 64-bit SoC @ 1. 5GHz
- 4GB LPDDR4-2400 SDRAM
- A 2. 4 GHz and 5. 0 GHz IEEE 802. 11B/g/n/ac Wireless LAN
- 2 × USB 3. 0 ports, 2 x USB 2. 0 Ports
- 2 × micro HDMI ports supporting up to 4Kp60 video resolution
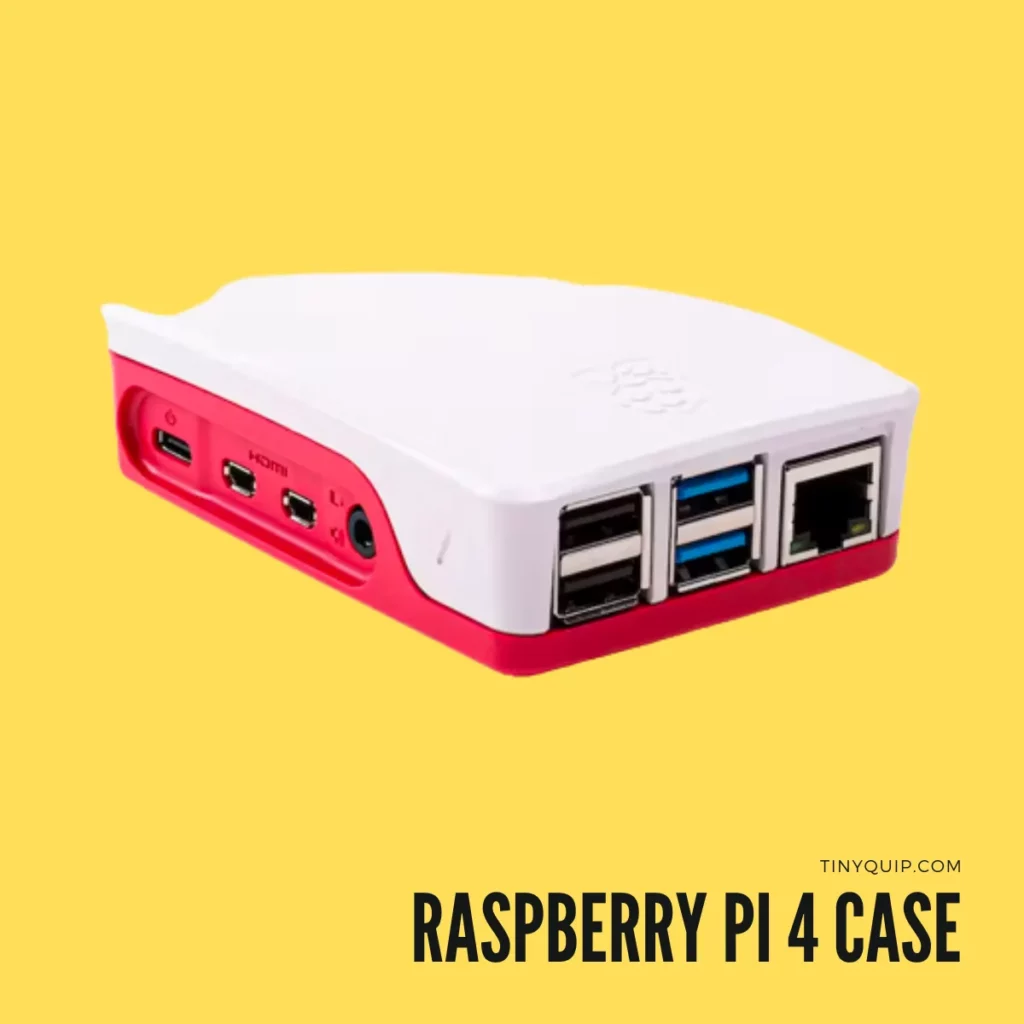
Raspberry Pi 4 Accessories


Using OpenVPN: The List of Features
There are a few VPN protocols, and one of the most reliable and working options is the OpenVPN protocol. With OpenVPN, you get a bunch of features that make your internet easier and more secure. And with OpenVPN on your Raspberry Pi, you can create a VPN service for yourself which is more personalized, and only your devices have access to it.
Here are some of the prominent features,
- Split tunneling to securely communicate data
- Geo smart routing
- Built-in local authentication along with MFA, SAML, LDAP, RADIUS, PAM, and custom authentication system
- Static tunnel IP address
- Hardware address checking
- DMZ access
These are only a handful, and if you plan to create a VPN server for business or connect more devices, there are a lot more features that will come in handy with OpenVPN service. Thankfully, the free version allows us to concurrently connect two devices and use all the features that OpenVPN offers.
Also Read: Best & Free Network Monitoring Tools for Linux
How to Create a VPN Server using Raspberry Pi and OpenVPN
Now that we have our list of requirements to create a VPN Server, let’s closely look at the steps on how you can set it up.
The first few steps are to set up our Raspberry with an active operating system and then install the OpenVPN server on it. Later, we can configure the device with different VPN services, such as NordVPN, or use OpenVPN itself.
We can use Putty or other SSH windows to configure our Raspberry Pi to run Ubuntu or other Linux OS so we can set up OpenVPN later. In such a case, you don’t require an additional mouse or keyboard; your active computer with internet access and a USB cable to connect Raspberry Pi will be enough. Here is a more detailed guide on how to install Ubuntu on Raspberry Pi.
1. Raspberry Pi Imager – Preparing the microSD Card
The first and foremost step is to download the Raspberry Pi image file for your active computer so we can configure the microSD card.
Here are Raspberry Pi downloadable files based on your preferred operating system,
These are setup files not for your Raspberry Pi but for another working system on which you are going to set it up. Do not confuse it with the other.
Once you have the file, run it by double-clicking on it, and you will see a guided GUI window for writing the OS on the microSD card for your Raspberry Pi. Now, tap on the “Choose OS” option, and you can see a bunch of different operating systems you can install on your Raspberry Pi. But as we are setting up a VPN server and need a more easy way to configure it, we will choose the “Other General Purpose OS” and then pick Ubuntu Server from the list.
Now, connect the microSD card using an SD card adapter or directly if your computer has a dedicated port for it. Ensure you rename it with a more easy name to remember and format it once if it is a used card with files on it.
Choose this microSD card under the “Storage” option and tap on the “Settings” icon for a more advanced menu.
Also Read: 11 Best Linux Distro For Programmers
2. Advanced Menu on Raspberry Pi Imager
The advanced menu is one of the crucial sections, as here we will be setting up wireless connectivity, username and password, SSH, and other crucial information for our Raspberry Pi. No doubt, you can do these things later, but it will only add up to extra work and complicate things at times.
To begin with, set a hostname for your Raspberry Pi, and it is advisable to have something related to what you are going to use the device for. In this case, something like “pi-vpn-server” is easy to remember and configure later.
The second step is to provide the authentication method for your Raspberry Pi; there are two options: 1. SSH authentication, 2. SSH authentication with keys. I personally prefer using SSH authentication only, but if you want more advanced encryption standards, you can use public and private keys along with it.
In the third step, we will set up a username and password, which are essential for you to login into your Raspberry Pi. I suggest you note it down somewhere so you never forget.
As we are creating a VPN server for our home network, we will also have to configure the wireless LAN settings. In my case, I have been struggling a lot when it comes to configuring a wireless network later after the Raspberry Pi boots up.
Start with filling in the SSID, password, location, time and date, and other relevant details to correctly make a connection. Ensure you are entering the correct password, or you might see an issue or error during the setup.
Once done, the rest of the other checkboxes don’t need special attention; click on “Save” and then on the “Write” button to flash the OS on your microSD card.
Also Read: How to Change Your Linux User Password?
3. Booting up your Pi
Now that we have our microSD ready with the Ubuntu servers on it, the next step is to place it inside our Raspberry Pi and then configure it. In later steps, we will also install OpenVPN access servers to create and configure a VPN server on the Raspberry Pi.
In this step, we will require a keyboard and an HDMI screen so we can see what process is currently active and command the next process. After inserting the microSD card and connecting the keyboard and screen, power up your Raspberry Pi.
When booting for the first time, you will see a cloud-init process that runs automatically and should take a minute or two to complete. You will know the process is complete when a few commands are returned on the screen. Interrupting this process will have you rerun it from the beginning, so let the cloud-init process complete first.
4. Headless Connection
Once done, we need two items; first is the IP address of your home network, which can be typically found from your router’s dashboard, and second is the SSH client, which comes pre-installed on Windows and Mac machines.
Here is an alternative way to find the IP address of your Raspberry Pi,
Open the Pi terminal and enter the following command,
hostname -IHere, the hostname is the name we set earlier for our Raspberry Pi using the advanced menu options. For this guide, we set it to pi-vpn-server.
Your Raspberry Pi’s IP address should then appear on your screen. Copy it for future reference.
SSH clients are pre-installed on Windows machines; alternatively, you can use Ubuntu on WSL-2, as discussed in one of our prior guides. You can also use software like Putty if you don’t have the built-in SSH client on your desktop.
But for the time being, let’s use the built-in SSH client and use the following command,
ssh @ You can also use,
ssh @ The above commands work for Ubuntu, macOS, and Windows (built-in SSH)
Now, you will be prompted to confirm the connection with a Yes/No option. Type “Yes” to confirm the connection and then proceed with username and password. These are the same that we set up in the Raspberry Pi Imager’s advanced menu while flashing the operating system on the microSD card.
5. Installing OpenVPN Access Server
Most of the setup for our Raspberry Pi is done, and we now have a Ubuntu server installed on our Pi. However, we still need to install the OpenVPN server and configure it to create our VPN server.
To do this, we first need to create an account on OpenVPN for Access Servers, which is free to create for two concurrent connections and offers all the features.
The time zone parameter is important for Google MFA and other connection certificates. You can set the time zone using the following commands,
apt update

apt -y install tzdata

dpkg-reconfigure tzdata
The above commands install a time zone program and configure it to match your current location, and reflect it on your Raspberry Pi.
Along with the time zone, we also require internet access which is great with a firewall offered by your router. Configure your router and enable the firewall if it is disabled. The Access Servers on OpenVPN require ports TCP 443, TCP 943, TCP 945, and UDP 1194 from the connection to the private IP address on Raspberry Pi behind the firewall.
Head back to the Access Server page where we created our account and follow the below steps,
- Tap on the “Get Access Server” option
- Click on the Ubuntu icon, as we have the Ubuntu server installed on our Pi
- Choose the Ubuntu server you have installed on your Raspberry Pi; most commonly, it is ARM64 bit, Ubuntu 20 LTS.
- Follow the instructions on your screen to install the Access Server using the command line.
You will now find admin and client web URLs with username and password. Copy these for future reference, as they are randomly generated and will be required to log in to your access servers. You can change them later.
6. Admin Login to OpenVPN Access Servers
Now that we have the access servers installed on Raspberry Pi, we can configure and manage it as per our needs.
In the prior step, we got an admin and client URL; these are basically the web addresses for us to manage our VPN server and download the configuration files. The web-based GUI makes it easier to manage resources, certificates, connections, and more.
Once you open the admin URL, you can find a security certificate issue (SSL), which is because the admin URL is self-signed, and you can later upload your own certificate for it. However, for now, tap on the “advanced” option and continue to the website.
Enter the admin username and password generated in the last step. For OpenVPN 2.9 and above, you will have to manually set a password using the command “passwd openvPN” and set a new password.
Also Read: Linux Commands Cheat Sheet | Using Linux Like a Pro
7. Get the OpenVPN Activation Key
The next crucial step to use our Raspberry Pi as a VPN Server is to have an activation key for OpenVPN. You cannot set up your VPN Server without this key. Don’t worry; you can get it for free on OpenVPN.
Once you login to the Admin panel on your Access Server, you can find the activation page; follow the below steps to get your activation key,
- On the activation page, tap on the “Get Activation Key” option.
- You will now be redirected to the “OpenVPN” sign-in page; sign in using your account.
- Now, click on the “Use Subscriptions” option followed by “Proceed with Subscription.”
- Select the number of connections you wish to have; for the free plan, select two concurrent connections and then tap on the “Create” button. If you choose more than two connections, you will be billed accordingly.
- Once the subscription process is completed, tap on the “Copy Key” button to copy the subscription key.
- Go back to the “Admin” URL and paste the key in the activation field.
- Tap on the activate, and you should be able to proceed further.
Our VPN Server is almost ready, and we can make it more tidy by using a fully qualified domain name. However, it isn’t much required and feels like an unnecessary expense to give your home VPN server a domain name. Instead, you can use the IP address, and if you have trouble remembering it, you can bookmark it for later.
Also Read: 10 Best & Free Screen Recorders for Linux/Ubuntu
8. Adding Users to Our Raspberry Pi VPN Server
The VPN server is now ready for use, but we haven’t added any client or device to it. A client or a device, in this case, is what we will be using the VPN service on, most probably a smartphone or a Windows machine, or a smart TV.
Here are some simple steps to add a client or a device to your freshly set up Raspberry Pi VPN server,
- From the admin panel, look for user management followed by user permissions; you will find a dedicated page with all the users and their information on it.
- Create a new user and assign them permissions on how they can access your VPN server. You can set up auto-login and, using the “More settings” option, set a password for this user. The username and password are what you will need later, so note it down for later.
- Head to the Client URL that we have copied a few steps before and log in using the username and password we just created.
- Now download the app for your device; if it is an Android phone, download the Android app and likewise.
- You also get to see a client profile or certificate, which you need to download for the next steps.
- Install the app and sign in using your client username and password.
- You will find an option to upload the profile or certificate and upload the file we have just downloaded.
Voila, we have our Raspberry Pi VPN Server ready for testing and use.
Also Read: Things to Do After Installing Kali Linux – Most Important
How to Use NordVPN with OpenVPN on your Raspberry Pi VPN Server Connections (Optional)
If you already have a NordVPN subscription and want to enjoy all the prominent features on your Raspberry Pi VPN Server, you can club them both. Thankfully, NordVPN uses OpenVPN as one of their VPN protocols, and we can both the services together. This helps us create a more powerful private VPN Server on Raspberry Pi with features like Geo-unblock, multiple servers, and much more.
Get NordVPN
- A no-log policy with independent audits
- Fast servers for seamless streaming
- Security such as 256-AES encryption and secure channel for transmission.
- Added privacy protocols
- P2P servers and torrenting
- Streaming without geolocation restrictions
- Heavy discounts
Here are the steps to use NordVPN with OpenVPN Raspberry Pi VPN Server,
- Head to the NordVPN server configuration page, choose a server that you wish to use and download the configuration file.
- Download and install the OpenVPN client. To make this guide simpler, we are using an Android phone as an example.
- Once the app is installed, tap on the “File” tab and choose the configuration file we downloaded from NordVPN.
- Tap on the “Import” button to upload the file, and you will see a new window with the username and password fields.
- Now head to the NordVPN dashboard, and under my services, look for the advanced configuration tab. Here you will find the username and password; tap on the copy button or note them down.
- Go back to the OpenVPN client and enter the username and password we just noted down.
- Once done, tap on the “Add” button, and you will see the connection profile on your OpenVPN dashboard.
- Toggle the profile, and the app will ask you for necessary permissions; allow them if you agree, and tap on continue. You might be asked to select the client certificate; you can skip it by tapping on the “Continue” button.
There you have it, NordVPN on your Raspberry Pi OpenVPN Server.
Wrapping up: Creating Your Own VPN Server using Raspberry Pi and OpenVPN
This guide easily covers the basics of how you can set up your Raspberry Pi with OpenVPN to create your own VPN Server. While VPNs like NordVPN offer a great experience and bundled features that make internet life easier, a personal VPN server makes it more secure and reliable. Also, with OpenVPN and two concurrent devices, you get to use VPN for free without paying a penny, of course, excluding the hardware and electrical bills. On the contrary, Raspberry Pi consumes minimal electricity, so you are still saving a lot on your VPN Servers over a commercial subscription.
I hope this guide came a lot in handy to help you create your own VPN Server using OpenVPN on Raspberry Pi. And there is a lot that can be done with Raspberry Pi, and we will try covering it in our future guides. Meanwhile, if you have a question for us, drop them in the comments below. If you like this article, do give this a quick share on your social media handles, and do tag us. Also, join our Telegram channel, Facebook page, and Twitter to never miss a quick update.