Gmail is one of the most used E-mail clients on the internet with over 1.5 billion active users in Global active users. But if you are a Gmail user you might have at least once experienced the pain of missing important emails; just because they were labeled in the spam or promotional tabs. In this guide, I am about to show you how to use Gmail filters to never miss important emails from work.
Also read: 21 Best MacBook Pro Accessories For Work From Home
What is Gmail Filters?
Gmail by default categorizes mails into different labels, these are based on criteria such as sender or what content the mail includes. For example, if the mail is sent from Facebook or Instagram regarding account services, you can find them in the primary tab. Similarly, if the same sender has sent emails regarding promotions or business; you can find them in the spam or promotions tab.
This is a great feature as it removes all the unwanted emails from your primary inbox. But, there are times when you get emails about work and you end up finding them in the spam box.
In such a case, you can use Gmail filters to categorize your emails and avoid them going into the spam bin.
But how to use these Gmail Filters?
Filtering Emails using Gmail Filters
Filtering Emails will help you in organizing your Gmail inbox and making sure you never end up with important emails in spam. This is how to use Gmail filters –
- Open Gmail on your desktop.
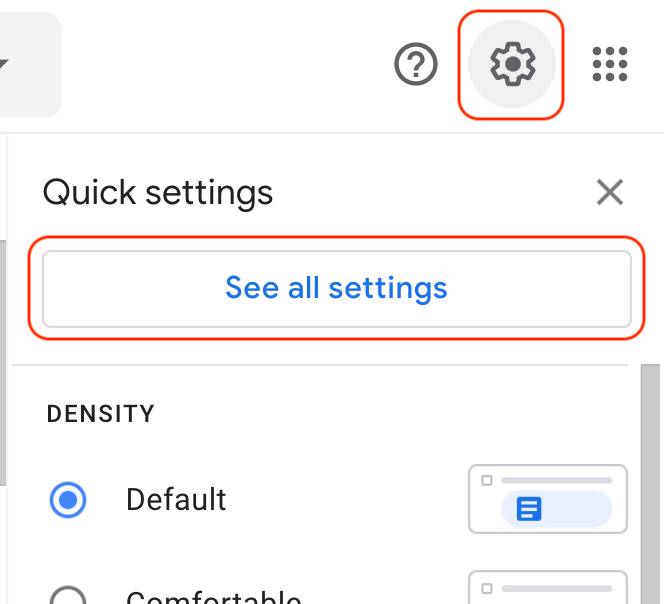
- Click on the Settings icon and select “See all settings”

- Great, now you can see a bunch of settings such as labels, accounts, general and more.
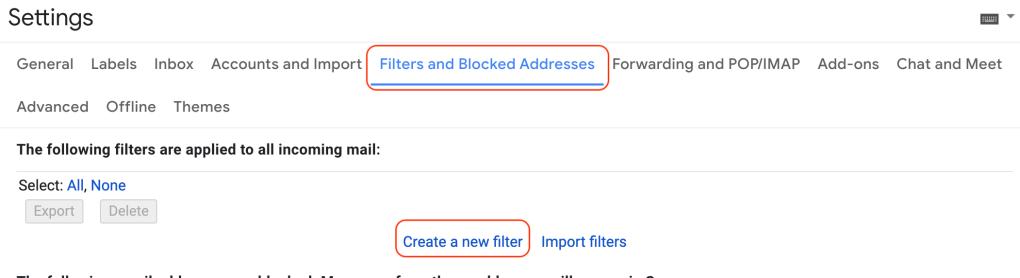
- Click on “Filters and Blocked addresses” and you can find “Create New Filter” below it.
- We will now create a new filter to receive all the work-related emails directly to the primary tab.
Creating a filter requires you to know exactly how you want to filter the emails. If you are confused, you will still send important emails to promotions or spam.
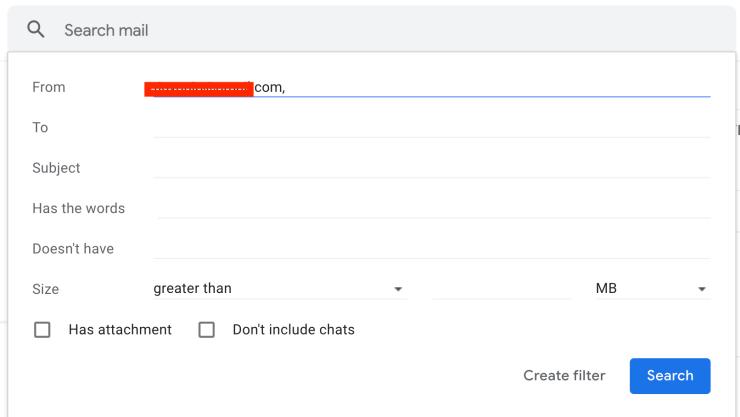
Here, from the below image, we can see there are certain parameters that you can use to filter emails. These include,
- From
- To
- Subject
- Has the words
- Doesn’t Have
- Size
- Attachments and chats
Based on these parameters you can filter your emails and well organise your inbox.
Here are what they mean,
From
This parameter is used to specify that the emails from a particular email-id are to be filtered. The filter you will create will affect emails from this ID.
To
If you want to filter emails that you plan to send to specific email addresses, you need to specify the address here.
Subject
The subject parameter helps you to filter emails based on the subject line of the emails you receive.
Has Words
If you want to filter out emails based on certain words in the message box, you can use the “Has Words” filter.
Doesn’t Have
If this is your work email, you can filter out the emails by words that are not important. Such a filter is helpful when you get a lot of promotional emails.
Size
Based on the size of the email, you can filter emails and create actions on them. Here, you can specify the size of the emails you want to filter out.
Attachments and Chats
Filtering out emails based on attachments and chats can be done with the help of this parameter in Gmail Filters.
Also read: 8 Best App Lock Apps For Your Android Device You Must Use [2021]
Creating Filters
Now that you have filled the parameters based on which you want to organize your Gmail box. Here are the steps on how to create a filter –
“I am using only a single parameter (From) to filter emails from a particular sender and move them to the primary tab”
- Enter the From address you want to filter the emails for; You can use multiple From addresses by using a comma (,).
- Fill in any other parameters if you wish to.
- Click on “Create Filter”
- Now you are shown a list of options that you can use to filter. In my case, I will select “Never send to Spam” and also choose the category “Primary”. By doing so, all the work emails from the sender will never be sent to spam and always shown in the primary.
- Click on “Create filter” and now, the filter is created.

We have finally created a filter to never send a mail to spam from a particular sender. Similarly, you can create more filters using Gmail filters and choose how you want to organize your emails.
You may also like,