
The Internet is a great place to learn, grow, and share your knowledge; but this might not be true when you get addicted to it. Additionally, if you are a parent, you wouldn’t want your child to get trapped in web addiction. It is easy to get familiar with obscene websites and in such a case you would want to avoid them; if your child is using a Mac computer, you don’t need to install any third-party apps to limit their use. In this guide, I will walk you through how to block a website on Mac and maintain content privacy.
We have already published a guide on how to block a website on iPhone with content restrictions; this is a similar guide but for Macbook users. If you or your child doesn’t have an iPhone and still want to break the internet addiction on mobile; check out our best picks on Parental control apps and social media detox guide.
3 Steps Guide on How to Block a Website on Mac
- Enable Screen time on Mac
- Limit websites
- Allowed websites only
The foremost thing you need to do is enable screen time on your mac; The second thing I want you to do is to write down the websites you don’t want to allow and websites that you want to be allowed. This will make it much easier for you to whitelist them while using the content restriction feature on Mac.
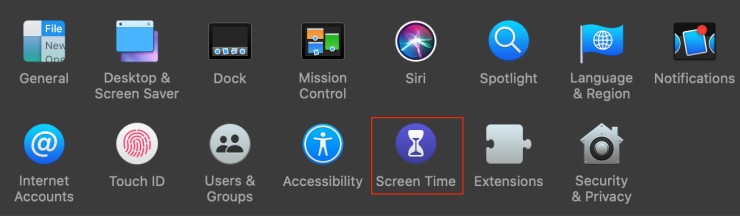
How to Enable Screen Time on Mac?
Screen time is by default enabled on Mac devices but if this not the same in your situation; Here are the steps to enable screen time on mac devices. Make sure to follow these before heading to blocking websites on Mac.
- Open the System Preferences by clicking on the Apple icon on the left-most part of the toolbar.
- Now, double click on the screen time and click on “Options” to enable the screen time. Click on the “Turn on” option to enable it.

You can also use “Command + Space bar” to open the spotlight and write screen time. Double click on the screen time tool from the search results and enable it from the options menu in screen time.
We have completed the first step from our How to block a website on the Mac guide. The next step is enabling content privacy and limited websites. I hope you have listed down the websites you want to block and the websites you want to allow.
Also read: How to Download Instagram Reels Video on Android and IOS?
Limiting Websites Using Content Privacy and Restrictions
The second step is to limit websites on a mac using the content privacy and restriction feature. This allows you to block websites that you wouldn’t want your child to interact with. Well, this feature is not only for monitoring children. You can use it to break any internet addiction that you have by limiting websites and apps.
Let us see how to limit and block websites using content privacy and restrictions –
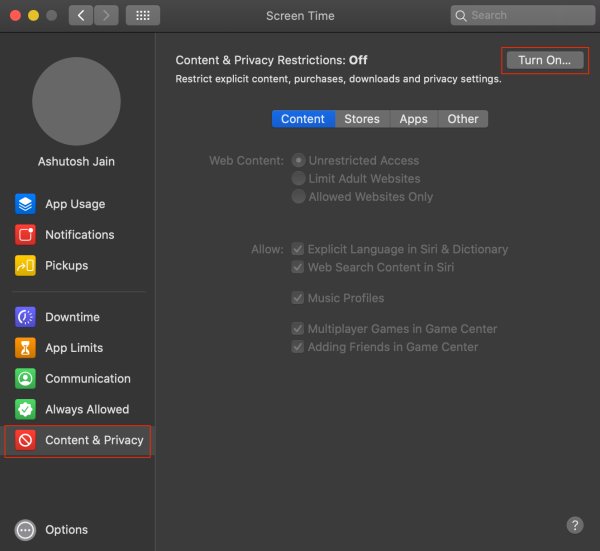
- Open screen time on your Mac computer.
- Navigate to “Content & Privacy” settings and click the “Turn on” button to enable it.
- You can find various settings and features here, select “Limited websites” to add websites you want to block and allow.
- Here, you can add websites you want to block and allow. This is where the list of websites you want to block and allow will help.
Also read: How to Secretly Use Scientific Calculator on iPhone
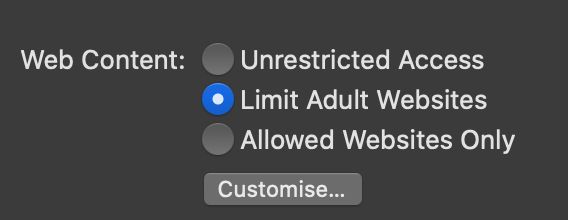
Allowed Websites Only
You can only add limited websites that can be accessed by the users. In this case, you get to whitelist websites and only these websites can be accessed by you or your child. This is a great feature when you don’t want your child to get familiar with obscene websites at an early age.
- Open the screen time settings and navigate to the “content & privacy” menu.
- Select “Allowed Websites only” and then click on “customize”.
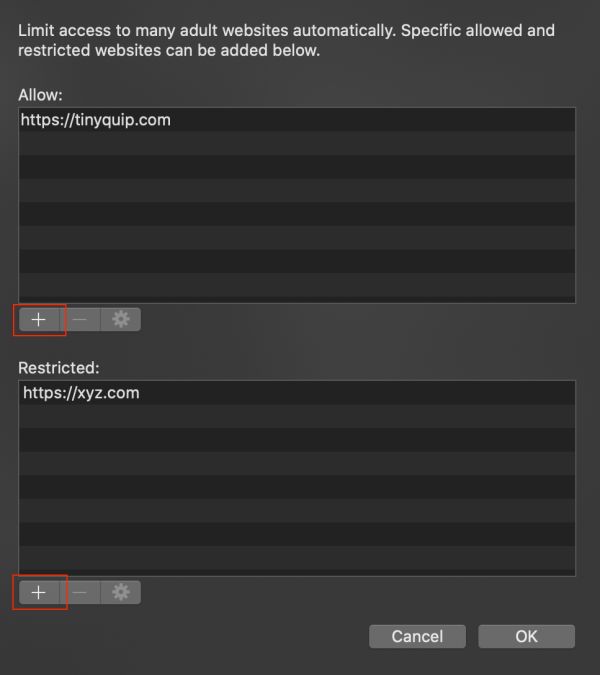
- Add the websites that your browser should only access.
- The websites in this list will only be accessible by your browser. Other websites won’t be able to load as they are now restricted. You can add more number of websites using the “+” icon in the customize option.
Here, you can find educational websites already whitelisted such as education city, nat geo, scholastic, and more. This is a great feature to keep your kids on the safer side of the internet.
Subscribe to our newsletter or join the telegram channel for more amazing tech related content.
You may also like,