

TWRP recovery is one of the handy tools when it comes to take a backup of your Android devices or install custom custom recovery images. TWRP (Team Win Recovery Project) is a third-party open source project and one of the best alternatives to the Cyanogen Recovery Tool; the best part of using TWRP is, the tool is touchscreen-enabled and supports most of the devices. In this article, we discuss how to install TWRP recovery from SD Card without using the ABD tools.
What is TWRP Recovery?
TWRP is an easy-to-use recovery software for any Android device; it enables you to take a backup of your Android device and install custom ROMs. Custom ROMs are customised android OS that is tweaked to do more than what stock Android OS does. These custom ROMs also aid towards cybersecurity and penetration testing as they allow you to install pen-testing apps which you usually find on Kali Linux. Best part? You can install Kali Linux ROM on your Android device and here are some of the things to do once you install Kali Linux.
By here, you must have understood a little basic about TWRP recovery. In further steps, we shall discuss how to install TWRP recovery on an Android device with and without using ADB tools.
Also read: How to Set Default Homepage in Android Browser
How to Install TWRP Recovery on Android Devices?
Installing TWRP on Android devices is easy and can be done in two major ways; However, both methods require some pre-requisites to install TWRP. Installing TWRP is also called flashing, it is an alias for installing such core tools on your Android device.
Caution: Installing TWRP Recovery may brick your device.
Pre-requisites to install TWRP –
- SD card
- USB cable
- Laptop/Desktop with an active internet connection
Installing TWRP recovery using Android App (Without PC)
One of the GUI-based methods which are simple and easy is to download TWRP Recovery from the play store. This must sound crazy but yes, TWRP recovery is available on the play store. However, it is good to know how to enter the recovery mode using the stock Android recovery.
To flash TWRP using the Android play store method is a convenient method but you cannot find it work at all times. The correct way to flash TWRP is using the ADB tools which are discussed later.
To install ADB tools using the Android app, here are the steps to be followed:

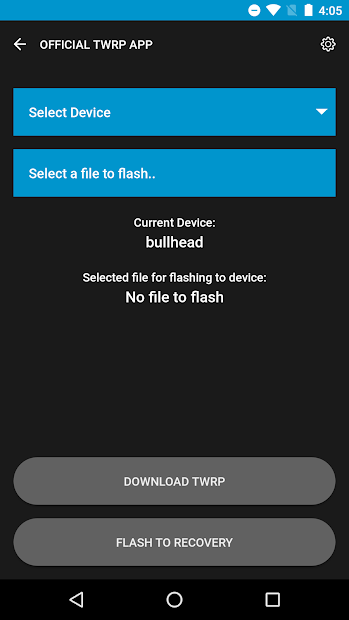
- Download the TWRP app from the Play Store on your Android device.
- Open the TWRP app and then tap on the flash option.
- From the list of devices, ensure to select your device along with the correct model number.
- Once you choose the device model number, click on the “Flash to recovery” option.
- After a few minutes, you should see TWRP is now successfully flashed on your Android device.
It is this simple to install the TWRP app on an Android device without using ADB tools. However, as mentioned earlier this is not an effective way and may not work sometimes. There is a second way of flashing your device with TWRP recovery which requires you to have a PC with an active internet connection.
Also read: 12 Best Chrome Flags for Android Devices that You Must Use
How to Install TWRP using ADB Tools?
Installing TWRP on Android devices using ADB tools is a more convenient and working method. If you are unable to see TWRP recovery on boot after you install it through ADB, you might have to repeat the process a few times.
This process requires you to have an active and fast internet connection; we will need to download a few large files and having a speed internet connection could be a good option for an easy and fast process.
If you are having trouble connecting to the internet, here are some of the articles that could help:
- Wifi Down? [Fix] Wifi Connected No Internet Using these Steps
- How To Share WiFi Password on Apple devices without Third-Party Apps
- 9 Best WiFi Range Extender and Internet Signal Boosters
- Best Ethernet Cable for High-Speed Internet Bandwidth
Here are the files that you should download on your PC to install TWRP using ADB tools,
Before installing TWRP recovery on your Android devices, ensure you have at least 80% juice on your device. You can also keep it connected to a power cable and keep it charge above 80% before you flash TWRP recovery.
Installing TWRP using ADB Tools (Step-by-Step)
- After downloading the TWRP IMG file and SDK tools; Copy the IMG file on a SD card and extract SDK tools on your desktop.
- We will need to enable the developer mode; If you have not enabled it, go to the settings menu > about > tap 7 times on the android build version (vary with devices).
- You can now find a developer mode option in the about or settings menu. Tap on it and enable “USB debugging” option.
- Once done, connect your Android device to the PC using a USB cable. A few device might also require unlocking the bootloader.
- Go the SDK tools extracted folder and hold “Shift + Right key (mouse)” to find a command prompt option.
- In the command prompt, type the following code:
adb devices
You should now see your device listed. If you are unable to find the device, check the USB cable for lose connections and change them if required. Also ensure you have your device drivers installed on the same Windows computer. - Once you find your listed device, type the following code:
adb reboot boot loader
This should take sometime depending upon what android device you use. As mentioned earlier, ensure you have unlocked your bootloader. However, it is important to note, unlocking the bootloader voids warranty. - After the bootloader is unlocked, type the following command:
fastboot flash recovery filename.img
Here the filename refers to the TWRP custom recovery image file you have placed in the SDK folder you previously extracted. - Once done, type the following command:
fastboot boot filename.img
Flashing of your TWRP custom recovery is completed and you can now see the interactive menu on your device.
Also read: Craigslist App For IOS and Android, Is it worthwhile to use?
How to Check if TWRP is Successfully Installed on Android Device?
Sometimes, you might need to try a couple of times before you could successfully install the TWRP recovery on your Android device. Based on the type of Android device you use, there are a couple more things to do such as unlocking the bootloader and a few more additional steps. Some android devices, make it easy to install TWRP while others take some time and attempts.
But how do you check if you have correctly installed the TWRP recovery? Here are some helpful steps,
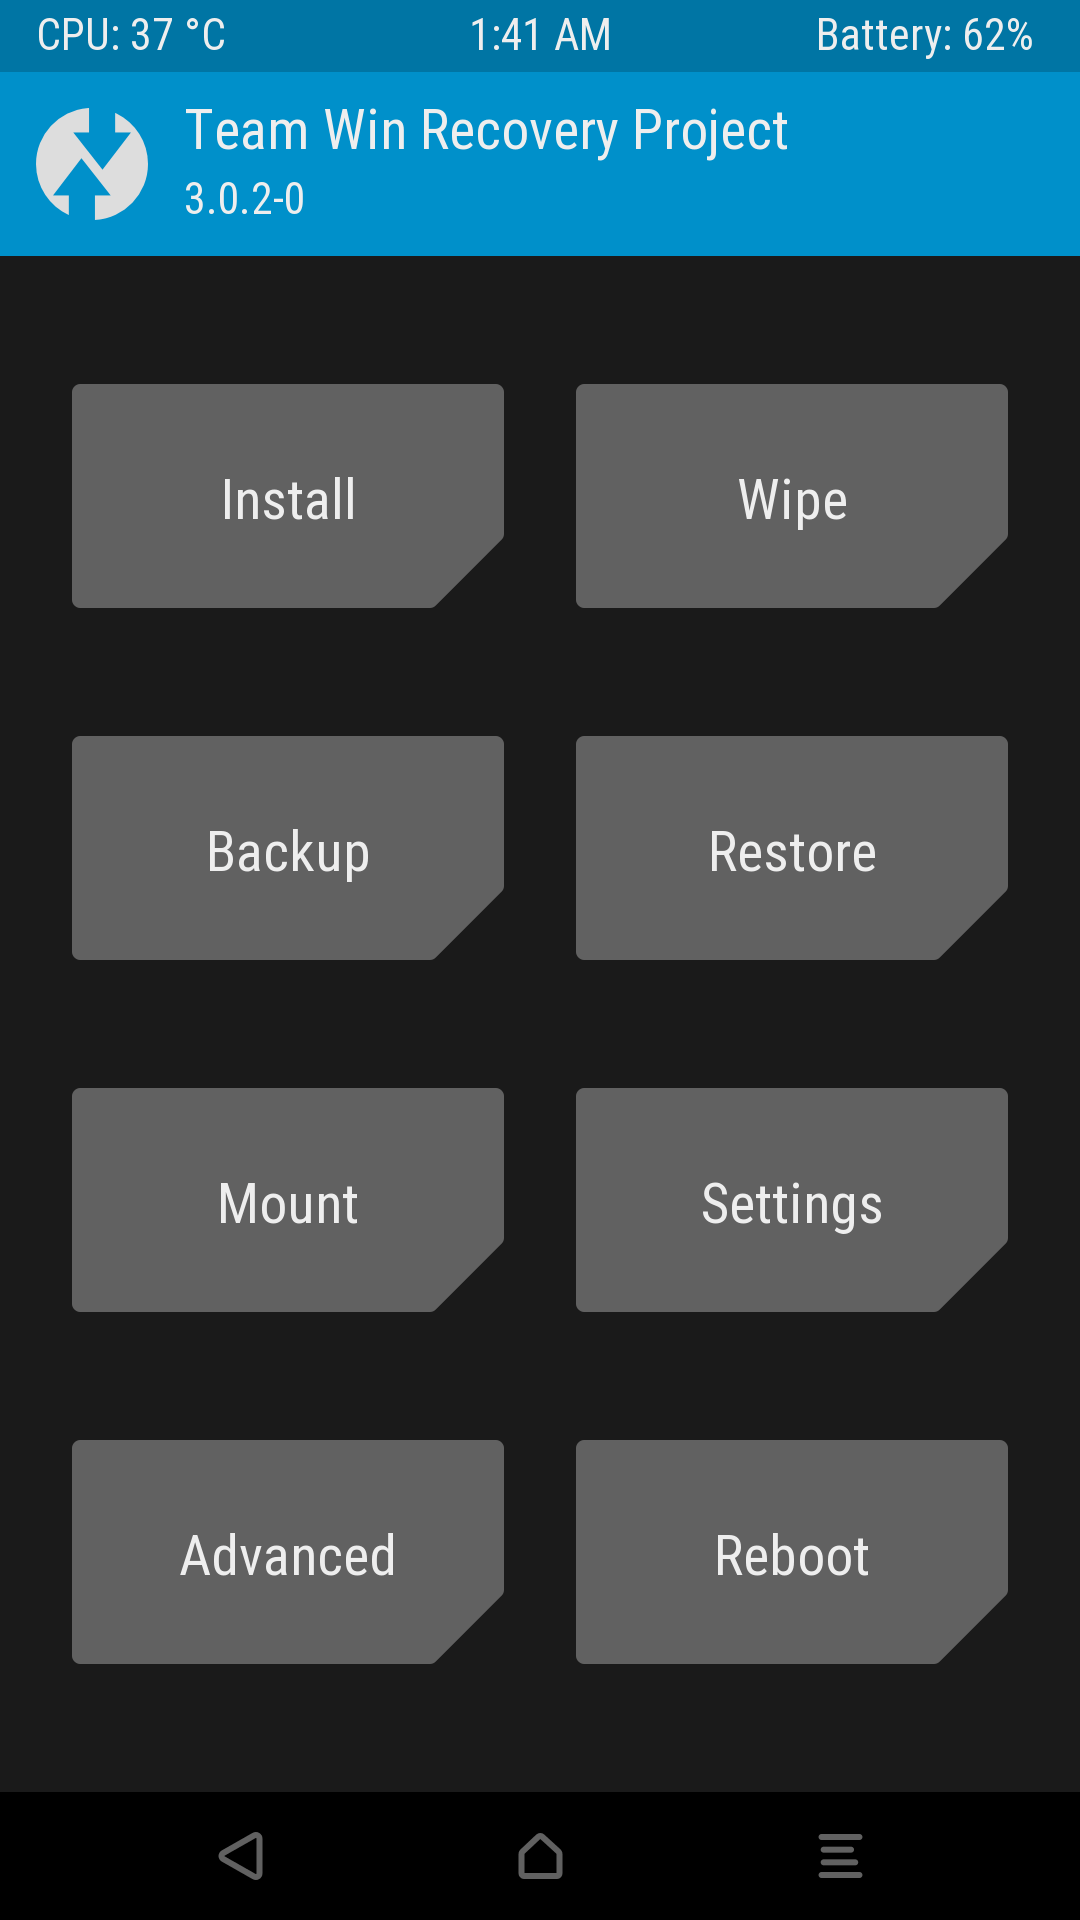
- After you have completed the setup of TWRP recovery, boot your device in recovery mode. For most of the android devices, Pressing “Volume Down + Home + Power” together will boot the device into recovery.
- Now, you should be able to see an interactive TWRP recovery window over the stock Android recovery as shown below.

- Take a backup of your device on external SD card and if your backup is successfully completed, the TWRP recovery is then correctly installed.
Quick Tip: If you are taking backup of the android system, place it in an external sd card.
Also read: Google Android 12 Developer Preview and Beta Download
List of TWRP Recovery For Android Device
What is Rooting?
Android systems are developed using the basics of the Linux kernel and rooting your device gives you superuser access. When you get this access you can easily change the software piece on your phone and customize it according to your needs.
After rooting you can delete the system apps, tweak some cool features such as a double-tap status bar to lock or adjust the brightness sliding the status bar. You can also increase the volume more than the system volume and do a ton of customizations. In simpler words, you can customize your phone according to your needs and not just theme it using the launchers. These android launchers only customize the looks of your phone but not the real customizations and so we root the devices.
Mostly rooting is done by hackers to install proper Linux systems on their mobile phones and perform hacking on the go. You might have seen such only in movies but it is cool and you can do it right here on your android phone.
Rooting alone won’t give you access to all the features, you need to install custom recoveries and tweaks using TWRP or any other recovery software. Our personal favourite is TWRP and it gives you a touch interface and also it is available for most devices.